
Our Editors independently research, test, and rate what we feel are the best products. We use affiliate links and may receive a small commission on purchases.
If you want your skis or snowboard to perform their best and last as long as possible, then maintenance is necessary. For whatever reason, there are a ton of skiers and boarders out there who seem to neglect one of the most crucial maintenance steps out there: waxing.
Perhaps they don’t feel comfortable with doing it or they simply don’t realize how important it is, but whatever their excuse may be, don’t let it become yours! We’re here to show you how a fresh coat of wax can change your world!
Required Materials
- Ski and snowboard vise
- Rubbing alcohol
- Waxing iron
- Plastic scraper
- Glide wax
- Brush
- Metal file
What actually needs wax? Well, you’re going to apply glide wax to the full base of alpine skis, all-mountain skis, backcountry skis, and all kinds of snowboards. However, you must note that glide wax is only applied to the tips and tails of your classic cross-country skis.
Type of Wax
With thousands upon thousands of waxes out there, how can you possibly choose which one is right for your equipment? Let’s take a look at temperature-specific waxes, universal waxes, rub-on waxes, and finally, fluorocarbons. Each have their own set of benefits.
Temperature Specific
You’ll find that the vast majority of waxes fall into this category. These waxes are applied using a waxing iron, which may be intimidating but we promise actually isn’t too difficult at all. These are made to be used in indoor temperatures. If you have any questions as to what that may involve, simply take a look on the wax’s packaging and it’ll have it all listed right there.
You’ll find that there are waxes made for above freezing temps, while others are below freezing. If you are in a cusp temperature where you could go either way, simply blend the two waxes and that’ll work just fine for you. However, to get the best results (faster speeds, smoother ride), you’ll likely have to experiment a bit with this part. There’s no issue with applying a less-than-ideal wax to your gear. It’s not a set-in-stone type situation and you’ll only get better and more knowledgeable over time.
Universal Wax
If you’re one of those relaxed skiers who just enjoys cruising around but aren’t trying to seriously compete anywhere, anytime soon, then this is probably for you. This is the wax that takes the guesswork out of it as they work in all kinds of temperatures. They’re applied just like the last classification of wax, however.
Rub-On Wax
Not a fan of the whole waxing iron thing? Not a problem! Simply use a rub-on wax! These are pretty similar to what you’d see surfers doing with their surfboards before they get ready to ride some waves. Just remember that while it’s better than nothing, it’s not going to be an equal substitute for consistent hot waxing.
Fluorocarbons
Last but not least, are the fluorocarbons wax. These, as you can probably deduce from the name, contain additional fluorocarbons which helps you to glide faster and easier over the snow. These come in an array of different qualities which will typically increase as the price does.
While the more expensive waxes are pretty pricey, these are usually delegated for serious racers anyway. If you’re just learning or are a casual skier/boarder then you’ll be just fine with a basic hydrocarbon wax.
Preparing a Board/Skis
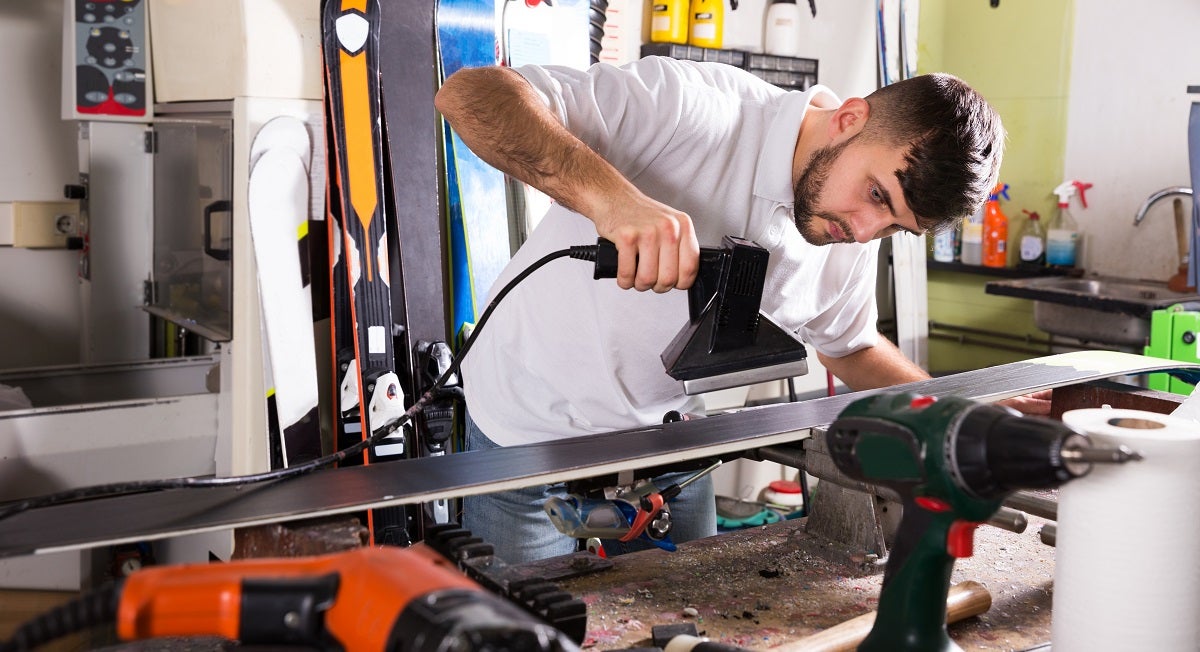
- Loosen/Remove the Bindings – You absolutely must do this before you set an iron anywhere near your board! We recommend simply taking them completely off, as you can wax it easier without worrying about navigating around them. Not only that, but you don’t want binding screws anywhere close to the surface of the base. As the screws can conduct heat when they get hot, it can cause serious permanent damage and even ruin your board.
- Place your board on top of a vise. For skis, retract the brake by depressing the pedal. Hook a large rubber band on one arm, pull it over the top of the heelpiece and hook it over the other arm to keep brakes out of the way.
- Place the skis base-up, tightening the vise around the center.
- Clean the Base – Even if your board/skis look clean, they probably aren’t. Make sure you remove any old wax, dirt, and grime from the base. This ensures that your board/skis can efficiently absorb the fresh wax. You can clean with base with a base cleaner/rubbing alcohol and a soft cloth, or hot scrape it.Hot scraping is basically where you take your iron to apply a thin layer of wax and immediately scrape it back off while the wax is still pliable and warm. Finally, take a cloth to get rid of any residue. This will pull off any remaining dirt and old wax to leave it clean and ready to absorb the fresh wax.
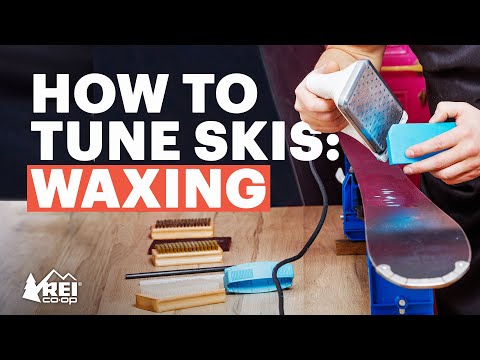
Applying Wax
These are basically the same processes for both skis and boards.
- Turn on the iron. You’ll want the temperature to be lower for softer/warmer wax and higher for higher/colder wax. Once again, if you have any doubts simply refer back to the wax package.
- Grab a chunk and hold it against the base of the iron. Be careful here as you don’t want to make a mess or burn yourself. Let it drip onto your ski or board as it begins to melt, keeping the iron a few inches above the base. Move your hand and the iron from side to side, tip to tail to ensure it covers the entire base.
- Now grab the iron, placing it gently on the base of the ski/board. You don’t have to press too hard, and make sure you don’t keep it in place for too long as this can blister the base which is a lot of hassle to fix. You want the wax melted all the way across the full base. If you have any dry spots, simply melt more wax over it. Make sure the wax is thin enough that one end of the ski/board is dry as you’re reaching the other end.
Now you wait! It should take no more than an hour for it to dry completely. Make sure you always keep your skis and board indoors as you are waiting for it to cool. Taking it outside will cause wax to push back out of the pores, making it impossible to properly absorb.
Scraping and Brushing
- Grab a plastic scraper, scraping from tip to tail. Never use a metal scraper as this can seriously damage your skis/board. Scrape from tip to tail, getting rid of any extra wax. Once you’re finished, you’ll notice that the base looks basically free of wax. This is good, as you only want the wax in the base’s pores anyway.
- Use the scraper in the metal edges. You may see a little notch in your scraper, which is made specifically for this purpose.
- Now grab your brush, brushing along the base to create more texture. This will boost speed and smoothness.
Final Tips
- Always apply wax in a ventilated area. Inhaling wax is never a good idea as once hot, will leave chemicals in the air that are unhealthy for your lungs.
- You want the iron to be hot enough to melt wax, but never hot enough to produce smoke or a smokey smell.
- Always work from tip to tail. This goes for when you’re waxing, scraping, and brushing.
Summary
Now that you’re practically a waxing pro, are you ready to try it for yourself? We promise that though it may look intimidating, the process is actually pretty easy. We’re sure that you’ll do a great job your first time, too, and that our guide has helped to orientate you a bit better. Thanks for tuning in, and we’ll see you again soon!