
Our Editors independently research, test, and rate what we feel are the best products. We use affiliate links and may receive a small commission on purchases.
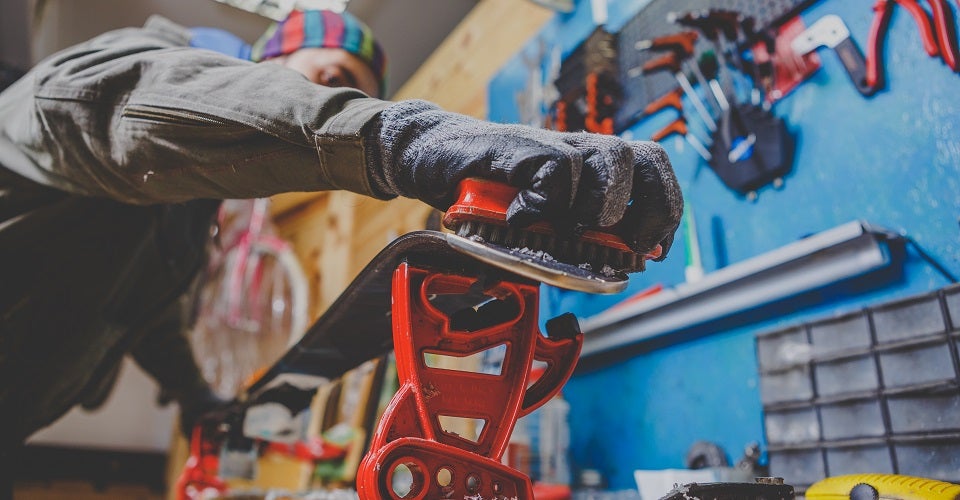
Tuning your skis is an expensive undertaking. You’ll pay good money every time you take your skis in for a professional wax or tune. Yet, many of the best skiers on the planet have their skis tuned by hand (or do it themselves) the night before the big day. If you want to save money and customize the feel of your skis or snowboard, consider investing in your own ski tuning kit. These are the best ski tuning kits currently available.
For more of my skiing & snowboarding recommendations, have a look through these popular Outside Pursuits guide links: Beginner Skis, Beginner Snowboards, Complete Snowboard Packages.
Quick Answer: The Best Rated Ski & Snowboard Tuning Kits
- Demon Mechanic Elite X Ski Tuning Kit
- Winterial Snowboard and Ski Tuning Kit
- Dakine Unisex Deluxe Tune Tuning Kit
- OutdoorMaster Ski Snowboard Tuning and Waxing Kit
- Grayne Deluxe Ski and Snowboard Tuning Kit
- XCMAN Complete Ski & Snowboard Tuning Kit
Ski Tuning Kit Reviews
#1 Demon Mechanic Elite X Ski Tuning Kit
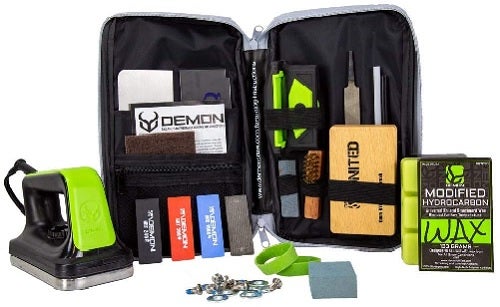
- Edge Tool: Yes
- Iron Included: Yes
- Vise Included: No
- Wax Included: Hydrocarbon
- Ski/Board: Ski
Demon tends to focus on the Redbull-drinking, no-limits, have to tune everything crowd.
Let’s be honest though, their kits are high-performance pieces loaded with quality gear for those with the skills to use them.
This kit stands out in several ways. Inside you get a full-size metal file which is a big step up from most kits.
Whether or not that has value is up for debate, however, as a decent metal file can be found at your local hardware for pennies on the dollar.
They also have 3 different file grits to clamp into the edge tool. This means you can get a much nicer hone on your edges than many kits with just one grit.
While the kit also contains an iron, scrapers, a mini brass brush, and a few other goodies it lacks some major components.
That’s not a bad thing, though, because you can fill in the gaps with a cheap brush kit and a vise with supports for pretty cheap.
This is a great kit to get started if you really want the best possible finished edge hone on your sticks. Just don’t forget to pick up the rest of the tools you’ll need for waxing.
Pro Tip: Sharp edges are critical for great on-piste performance, particularly on ice or hardpack.
Best ski sharpening kit for those who have or want to pick up the other gear separately.
#2. Winterial Snowboard and Ski Tuning Kit
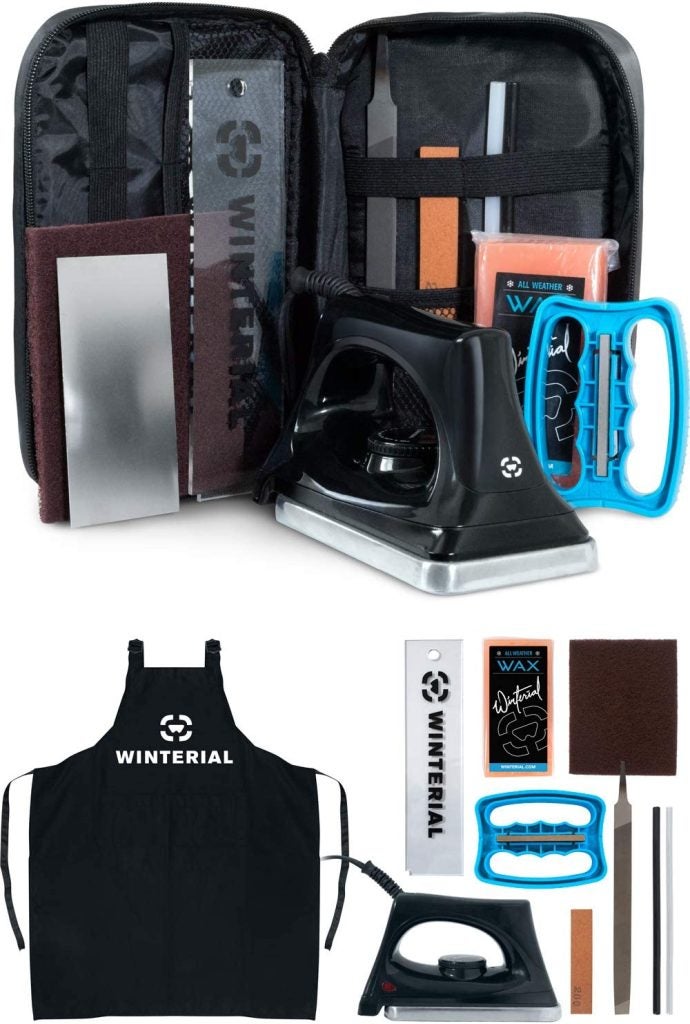
- Edge Tool: Yes
- Iron Included: Yes
- Vise Included: No
- Wax Included: All-Temp
- Ski/Board: Ski
While it might not be a brand name like Swix, this kit does pack in a lot of value at a great price.
I really like the finishing touches, like the apron, that make this kit feel a little more professional than others in the same price range.
Technically, this kit has what you need to tune edges and get a basic wax taken care of.
Really the only thing missing is a vise and supports which you might already have or can improvise in the garage.
That said, there isn’t a lot of “extras” here. There’s a single 200-grit stone, a very basic edge tuner set for 87-90 degree angles (covers most needs), steel and plastic scraper, ptex rods, iron, file, and some all-weather wax.
It’s really basic, but at the end of the day, it will get the job done particularly if you’re on a budget.
Note: You might be able to make this kit work for boards, but the manufacturer does not state the width of the included scraper.
Best ski wax kit for intermediate DIYers.
#3. Dakine Deluxe Tune Tuning Kit
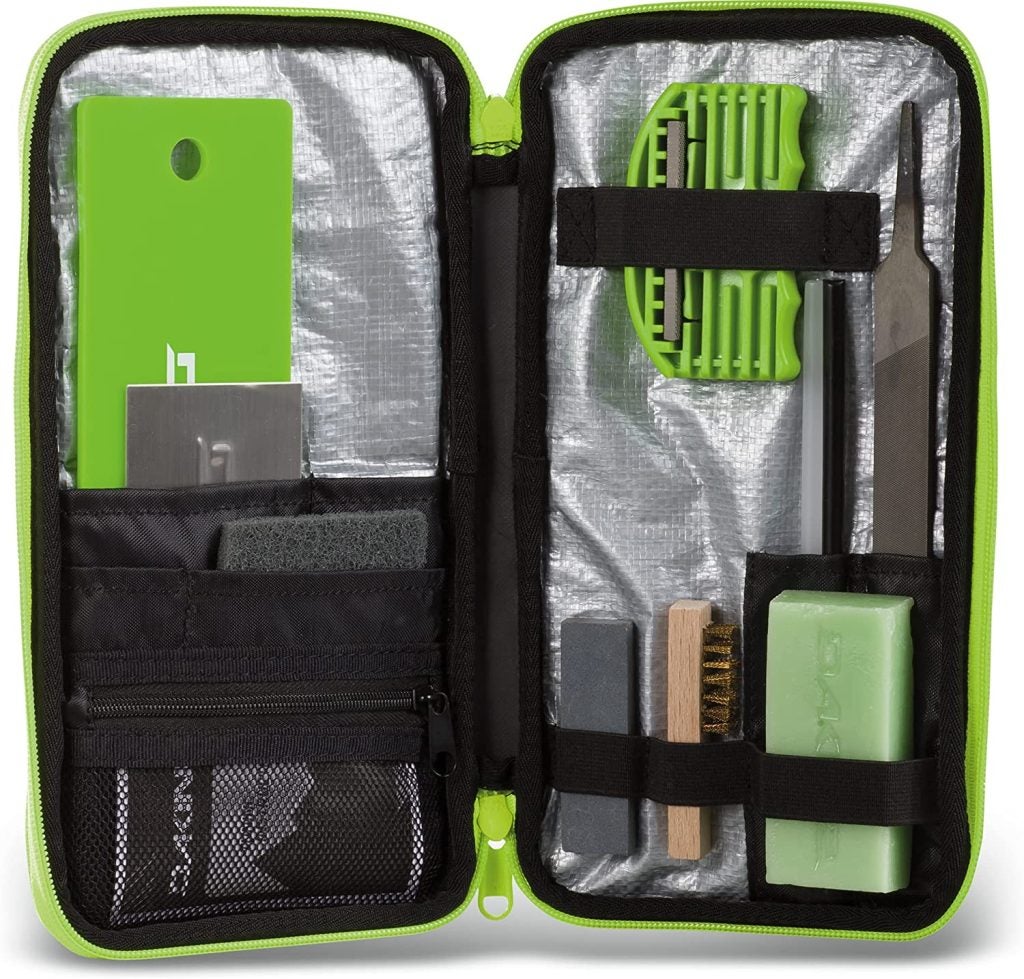
- Edge Tool: Yes
- Iron Included: No
- Vise Included: No
- Wax Included: All-Temp
- Ski/Board: Both
It’s pretty hard to argue that Dakine isn’t one of the top names in snowsports. This kit is small, easy to transport, and contains just the tools you need to get a quick job done.
This kit has scrapers, a scuff pad, stones, edge guide (0 or 2 degrees), ptex, file, wax, and a mini brush.
It has more of an “on the go” feel than an “at home workbench” feel. That said, it should have most of what you’ll need to get the job done.
While I do appreciate some of the more advanced edge sharpening guides, most skiers and boarders will do just fine with a 0 or 2-degree edge angle.
To use this kit, you’re going to also need a way to hold your skis or board and iron at a minimum. If you already have that gear or you can borrow it from someone, this kit will let you get started at a seriously low price.
Best ski tune-up kit for those on a budget.
#4. OutdoorMaster Ski Snowboard Tuning and Waxing Kit
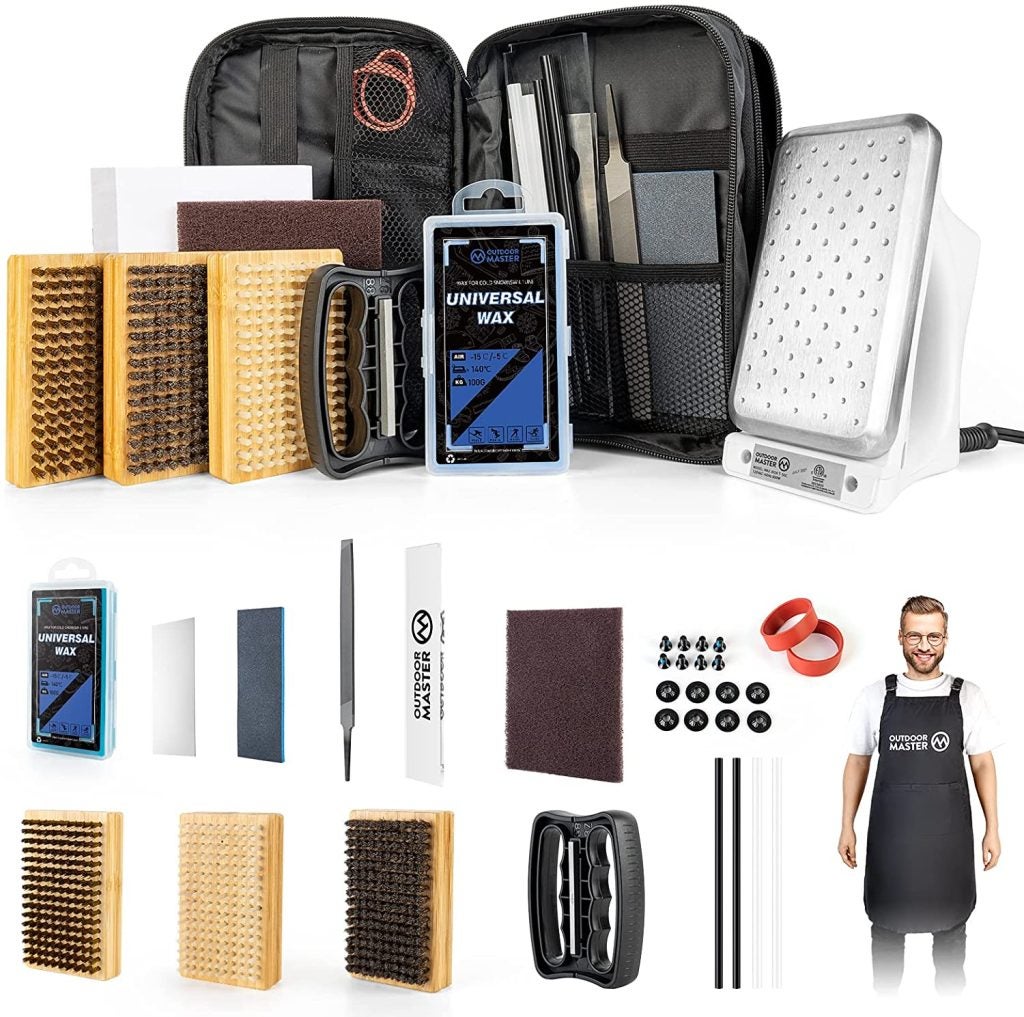
- Edge Tool: Yes
- Iron Included: Yes
- Vise Included: No
- Wax Included: Universal
- Ski/Board: Both
Let’s dive into a kit that brings out some useful tools for getting started sharpening and maintaining your own equipment.
This kit is one of the best ski tuning kits for beginners that comes with a decent variety of tools to fix up your boards. It’s pretty basic, but it will get you started and that’s what’s important.
Additionally, their nylon/brass/horsehair brush combo is a great option to have on hand for all work.
That said, I think the sharpening and edging equipment lag behind the iron and brush. However, they’re still going to get a basic job done. Combining this kit with something like the Demon Mechanic which is heavily focused on edge sharpening would really result in a well-rounded workbench setup.
#5. Grayne Deluxe Ski and Snowboard Tuning Kit
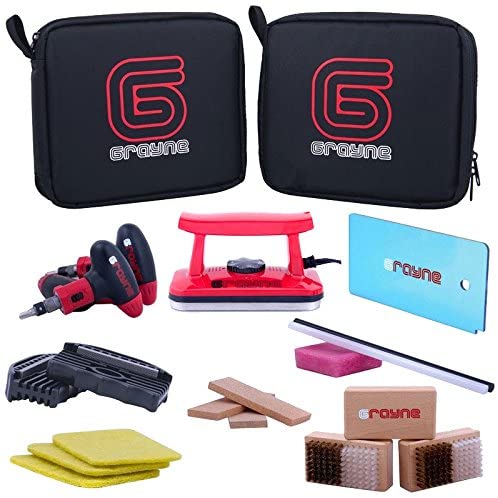
- Edge Tool: Yes
- Iron Included: Yes
- Vise Included: No
- Wax Included: All-Temp
- Ski/Board: Both
I have a beef with all-temp wax, it never works as well as temp-specific wax and it never lasts as long. However, considering this is a starter kit and its reasonable price point, the Grayne Deluxe tuning kit is worth mentioning.
Additionally, this kit includes a Dual-Degree edge tool that allows you to choose between 88 or 90-degree edges and have them carved out in seconds.
It comes with a dual-voltage iron as well that is specially designed for waxing skis and snowboards so you don’t have to ruin your clothes iron.
Like many cheaper kits, you don’t get a full set of brushes. You do however get a 6-piece ratcheting screwdriver, two P-Tex candles for filling gouges and core shots, a deburring and polishing stone and a nylon base pad.
What it boils down to, at the end of the day, is that this kit really is the best bang for your buck if you don’t need a vise or support stands.
#6. XCMAN Complete Ski Snowboard Tuning and Waxing Kit
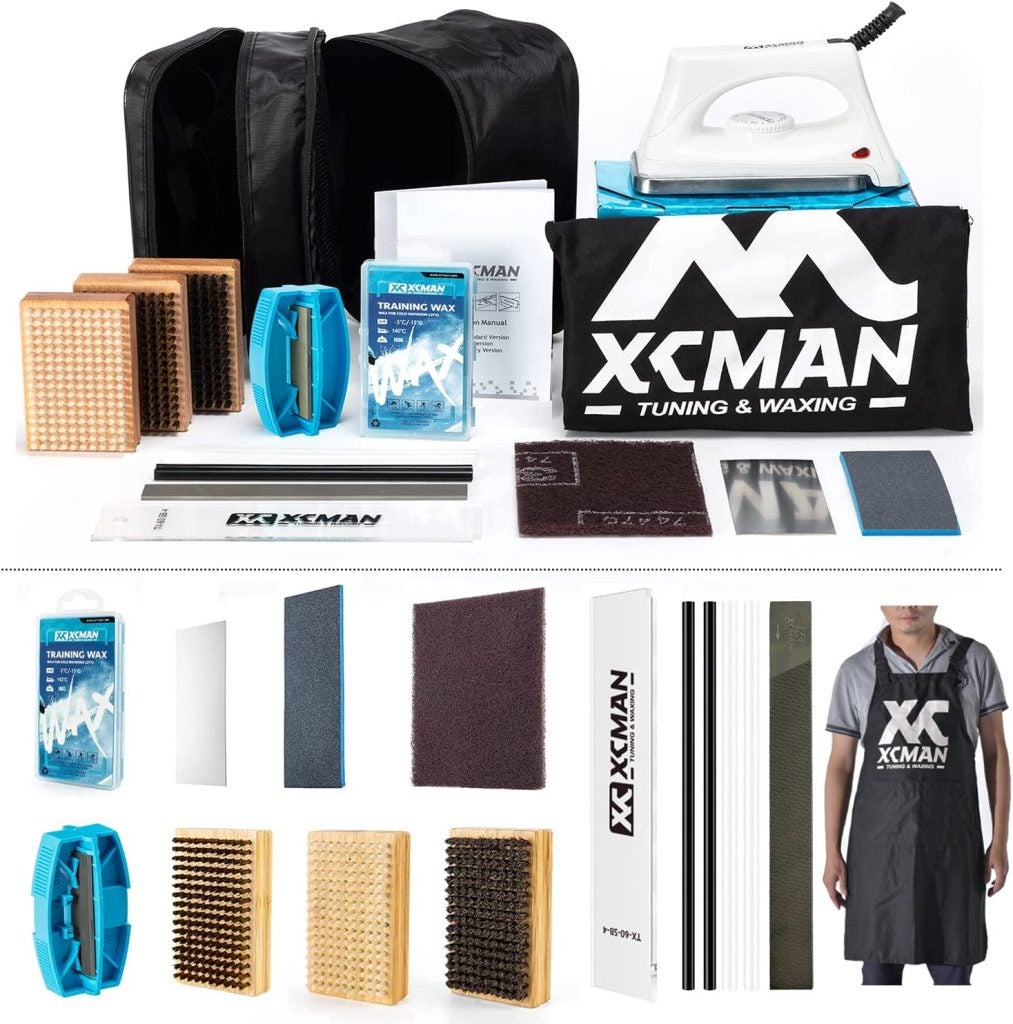
- Edge Tool: Yes
- Iron Included: Yes
- Vise Included: No
- Wax Included: Red, Blue or All-Temp
- Ski/Board: Both
Whether you want the very robust luxury version or the well-rounded pro version, this kit is pretty loaded with quality gear. Other than a vise, you’re ready to go with these kits.
Both of these kits are rocking good plastic scrapers, a full-size set of 3 brushes, an iron, edge guide (4 angles), file, and ptex along with a couple of other goodies.
Between the luxury and pro version, however, you’ll find a big difference in wax. While the pro version has a single brick of blue “cold snow” wax, the luxury version steps up the game.
With the luxury kit, you get blue, red, and yellow waxes covering tempts from -13 degrees Fahrenheit to 70 degrees Fahrenheit. Note that the wax is XCMAN brand so I’m not sure what quality to expect from it.
Maybe the only thing that could really take this kit to the next level is a couple more edge hones since the only one included is a pretty aggressive file for the edge guide.
Best kit for getting started if you want to cover every temperature of wax out there.
How to Choose the Best Ski Wax Kit for You
- Ski Waxes
- Waxing Irons
- Scrapers
- Brushes
- Edge Guides
- Stands, Clamps, and Supports
- FAQ about Ski Tuning Kits
- Conclusion
Ski Waxes
Since this is really a beginner’s guide to choosing a wax kit, we won’t go too far down the rabbit hole. Professional and hardcore waxers go nuts about their waxes, and there are many different types out there. If you’re new to waxing, don’t get too hung up on it.
Brick Wax
These are the big cubes of wax we think of when doing a tune-up or wax job in the shop. Brick wax is really only meant to be used with an iron during a full waxing procedure.
Brick wax comes in many different temperature ranges and qualities. Do your homework before buying and make sure when you’re bargain hunting that you don’t get ripped off by bottom-shelf waxes.
It’s worth spending a couple more bucks on a brick to go with a trusted name.
Rub-On Wax
If you don’t have run on wax in your pocket on the slopes, you’re missing out. As a full-time ski instructor spending more than 100 days a season on skis, I can’t even count how often I pulled out the run-on wax.
Got friends or kids with rental skis that stick to the snow like velcro? Whip out that run on wax and save the day! Forgot to get your skis waxed and you’re not sliding as well as you’d like? Save yourself with some rub-on wax and get back to skiing.
I’m not advocating that rub-on wax can replace a proper waxing – it can’t and shouldn’t! However, it can save the day particularly if you don’t want to hear little Timmy crying because he can’t ski since his rentals are sticking like glue on a spring day…
Keep the ZUMWax all-temp rub on in your pocket and you’ll be someone’s hero.
Hydrocarbon Wax
Beginner kits almost always come with hydrocarbon waxes. These are the most affordable waxes out there. Even though they’re relatively cheap, you can still get a great wax performance out of them. Besides, a hydrocarbon wax is much better than no wax at all.
Beginners would be wise to start here when learning.
Fluorocarbon Wax
Fluorocarbon wax is mad slippery. Fluorocarbon is super water-repellent and creates an awesome gliding surface on your skis.
Unfortunately, fluoro wax is also crazy expensive compared to hydrocarbon wax.
Buyer beware, however, as many online sellers sell poor quality fluoro wax. Fluorocarbon wax can range from pure fluorocarbon, high fluoro, low fluoro, to complete rip-offs that aren’t even truly fluorocarbon at all.
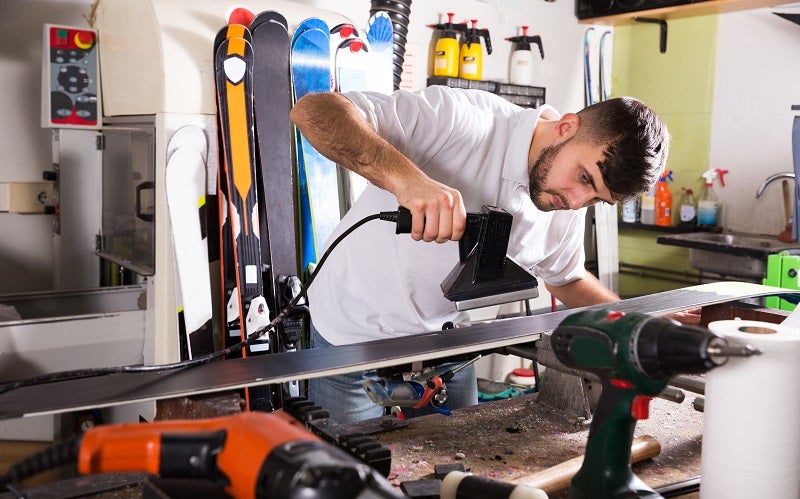
Waxing Irons
Waxing irons are little hot plates with adjustable temp and a handle. They’re meant for melting brick wax and spreading it evenly over the bases of your skis.
While any iron that melts your ski wax will get the job done, there are a couple of things you should probably keep in mind.
Many ski waxes, and particularly the more expensive fluoro waxes, can be damaged by irons that run too hot. For that reason, an iron with adjustable temperature and markings for each temperature is a good idea. Many cheap adjustable irons don’t have temperatures listed and, sometimes, don’t actually calibrate to the listed temperatures at all even if they are listed.
Another good feature to have is an auto shut-off. More than one garage waxing setup has been ruined (probably burned down) from irons that were left on after the would-be-waxer had one too many cold beverages during an evening of waxing. Even when we’re on the top of our game, we all forget things sometimes so an auto shut-off is a good backup feature.
Waxing irons are very simple. They just plug into a wall outlet and away you go. Do be sure that your iron has a plug appropriate for your area of the world.
Scrapers
When it comes to ski and snowboard scrapers there are two types. You’ll find metal and plastic scrapers out there.
Plastic scrapers are, usually, meant for scraping off excess wax when you’re done dripping and ironing in the wax. You’ll take the plastic scraper and do a few passes to shave off any buildup before you go over the bases with the final brushes.
One good feature to look for on plastic scrapers is a corner cutout. Often a scraper will have a small square cut from one corner. This is for running along your metal edges to quickly strip off any wax and expose the edges so they can do their job effectively.
Metal scrapers are, typically, for shaving down ptex fills. If you haven’t already, one day you’ll catch a rock with your base. Along with losing your ski, taking a huge digger, and knocking yourself around, you’ll also be left with a big gouge in your ptex bases.
After cleaning up the gouge, you’ll melt ptex into the gouge. Once it’s cooled fully you can come back in and scrape the excess ptex until your bases are flush and level again.
Pro Tip: Consider taking your skis to a shop to have them ground after you do your ptex fill.
Brushes
Brushes come in many different types. For this article, however, we’ll focus on the common ones included in beginner kits.
Typically you’ll want to use a metal brush such as bronze or copper first. These metal brushes help scrape off old wax and dirt. This opens up the bases for the application of new wax.
After waxing some choose to use a metal brush again. Personally, I find metal brushes a bit too aggressive and prefer a stiff nylon brush for post-waxing.
Horsehair brushes, depending on quality, can also often be used as a replacement for nylon.
If you forget what brush to use think of it like sandpaper. You want to start with something coarse and stiff (metal) and gradually move to finer grits such as stiff nylon (short bristle) and maybe soft nylon (long bristle) to leave that well-finished base texture.
Edge Guides
Edge guides are simple. An edge guide holds something abrasive at a known, fixed angle with a positive way to position it against your ski every time. That is to say – an edge guide holds a file or stone at a specific set angle and lets you firmly index it against the ski base to ensure repeatability.
For most beginner ski tuning kits, edge guides are usually quite simple. Often they contain only a 0 degree and 2-degree index.
More advanced kits, like the RaceWax edge guides on our list, may contain highly customizable edge guides. Some of the most accurate edge guides are adjustable in half-degree increments.
How do you know which angle you need? That’s much harder to know for sure. Edge angles can be set based on a number of factors such as skill level, ski type, snow conditions, etc. I won’t give advice on angle choice in this article because, frankly, I think you need to know a lot more than this article has time to explain before deciding on your edge angle.
If you’re confused about edge angle, I would highly recommend talking to an experienced ski instructor or ski shop.
Pro Tip: Your skis have metal edges which, over time, can be worn away by constant sharpening. Using too aggressive of a file/stone or sharpening your edges too often will shorten the life of your skis. A little bit goes a long way in terms of sharpening.
Ski Tuning Kit Stands, Clamps, and Supports
I know some people who use Irwin speed clamps and a folding table to get things done. I also know some who have multi-hundred-dollar vises and stands for their skis and boards. Whichever camp you’re in, just remember that the job of a vise and stands is simple.
All clamps and vises do are to simply hold your ski in place in such an orientation as to make it easy to apply wax and work on your skis without them moving on you. Supports help hold up the tip and tail of your skis so that you have something to push against when scraping, brushing, and ironing.
Most ski vises are designed to clamp to a table or workbench edge. Be sure that your stands or vise have enough jaw width that they will be able to accommodate the thickness of the table you’re working with
Pro Tip: Folding card tables are hard to work with since the edges and underside are rarely sturdy or flat. If you’re having trouble, try clamping a stout board to your table and then clamping your vise to the board.
Of all the vises and supports I’ve seen out there I really like two qualities: study and adjustable. For me, it’s a no-brainer that the vise needs to be metal in order to be rigid and hold steady your ski as you work. For supports, plastic is more acceptable. However, I really like height-adjustable supports so you can dial in the fit for your skis, vise, and table.
Pro Tip: If you’re doing this on the cheap, there are many ways to make your own DIY at-home clamps and stands. You can save some cash by trying to rig up your own way to hold the skis in place. A couple of stacks of books and some wax paper is a common on-the-cheap solution.
Ski Tuning Kits FAQs
Q: Should I tune my own skis?
A: If you’re brand new to skiing or you don’t like to or don’t trust yourself to work on your skis, skip it. Take them to the shop.
If you’ve been skiing for a season or two, you like to tinker on stuff, and you’re willing to do some research then yes you should tune your own skis.
It’s also probably a good idea to start on a cheaper pair of skis. It’s unlikely you’ll mess up anything but it hurts the soul to make a mistake on a $1,500 pair of skis.
Q: How often should you wax your skis?
A: If you’re an elite racer then your skis should be waxed every day before you hit the slopes.
For the rest of us alpine skiers, waxing depends on how often you ski and how much time you spend on your sticks. As a full-time ski instructor, I spent 6+ hours on skis every day. I found that I needed to wax weekly. If we translate that into hours, I would say that every 30-40 hours of ski time deserves a waxing and that’s probably pushing it.
That said, I also tend to run my skis a bit longer than I should between waxing. If you want better performance, consider waxing every 2-3 days of ski time or any time conditions change dramatically.
Q: What angle do you tune ski edges?
A: This is a very tricky question to answer.
Before you spend too much time tinkering with an edge angle, be sure your boots are fitted. We all have natural tendencies to unevenly pressure our ski edges. Getting a full boot fitting is crucial to straightening out any biomechanical discrepancies in your stance.
Once you’re sure that you’re actually standing and pressuring your skis evenly then we can move on to tinkering with edge angle during tuning.
There are a lot of factors at play when choosing an edge angle for your skis. Taking the edge angle off means you have to tip your skis over more in order to engage the edges. This is can help with doing a flat rotation or decreasing the likelihood of catching the outside edge of your ski and taking a digger on a turn.
However, the more edge you take off, the further you have to crank those skis over to get the edges to bite compared to a 0-degree angle offset.
As a full-time ski instructor, I can say with complete confidence that I never once saw a student actually getting up on their edges as aggressively as I’d like. I can say pretty confidently that the average skier does not know how to get their edges up to engage them. Therefore detuning them is just going to make this problem worse.
Detuning the edges makes a ton of sense for, say, park skiers. Any park skier can tell you that the last thing you want is for an edge to dig in on a feature like a rail. This will lead to an immediate scorpion and a spectacular double-eject explosion.
Detuning can help with whirlybirds, flat-ski turns, riding switch, and forgiving landing mistakes. There are also times when detuning an edge can be important for racers and other high-octane environments.
I recommend that until you have a very specific reason to tune your skis otherwise, keep them at 0-1 degree angles. I, personally, keep my on-piste skis at 0 degrees.
Pro Tip: Do not de-tune your edges to counteract poor technique. Get out there and ski it until you get it right, don’t try to fix poor technique on the tuning bench.
Q: How do I know if my skis need tuning?
A: Your skis should be tuned twice per season at least.
Before you hit the snow, get your skis looked at and tuned up. Make sure the bindings are adjusted and that rust hasn’t built up on your edges. You’ll also want to get last season’s final wax removed and ready for the new season.
At the end of the season, you should have your skis tuned up again. A good ski shop will take the tension off your bindings and do a generous end-of-season wax to seal up your edges and bases so they don’t degrade during the off-season.
Throughout the season, check your edges. Run your thumbnail lightly along the metal edge being careful not to cut yourself. If you feel or see excessive nicks and dings, it’s time for a tune-up.
Additionally, if you find that your skis are sticking to the snow or failing to bite into the snow when on edge then it’s probably time for a tune.
Q: How long do skis take to tune?
A: Any good ski shop will have your skis tuned overnight.
If you’re new to the processes and taking on a DIY approach then you’ll want to allot about 45 min – 1 hour per ski.
Experienced ski tuners and waxers can get simple tune-ups done in 15 minutes per ski or less.
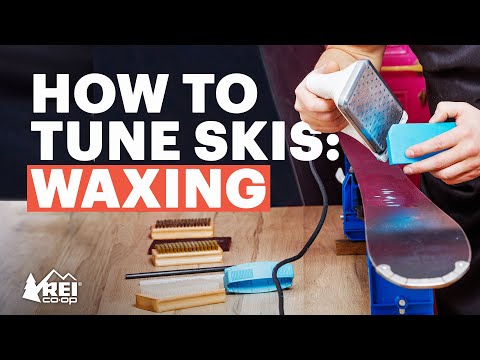
How to Wax and Tune Your Skis or Snowboard
Conclusion
Whether you want to save money or take matters into your own hands, doing your own waxing and tuning can be a great opportunity for that! As you get better you’ll be able to keep your skis in tip-top shape and quickly perform tasks a ski shop would charge tons of money for.
Remember, however, ski tuning and waxing isn’t for everyone. It’s messy, takes up a bunch of room, and takes a while to master. Once you get it down, however, you’ll have full control over your skis and you’ll love the way they move!
Grab a cold beverage, rewatch Gnar, and enjoy a relaxing evening of waxing your skis by the fire. It’s what mountain life is about.
Author’s Expertise / Why You Should Trust Our Reviews
I started writing online for my own outdoor sports blog in 2010. Right out of the gate I landed opportunities to test gear for Road ID, Hydrapak, Wolverine, Helle Knives, Pearl Izumi, and GU Energy. Those were the days when growing a no-name blog was easy. Today niche blogging is a different story.
In 2012 I left Central Wyoming College with a degree in Outdoor Education and Leadership. Soon after, I was on a month-long expedition with the National Outdoor Leadership School’s Outdoor Educator Course which helps would-be outdoor guides ascend from “aspiring” to “inspiring”.
Between here and there I’ve participated in and spoken at length about outdoor pro-deal programs for companies like Patagonia, Smith Optics, Giro, Therm-a-Rest, Platypus, MSR, Columbia, and many more. I still work closely with tons of outdoor gear companies to review and analyze products. If you have a product opportunity you’d like to discuss, please review my guidelines and contact me here.
After several seasons of guiding backpacking trips and working as a certified Alpine Ski Instructor at Deer Valley Resort in Park City, UT for several seasons, I had to move on. As any educator will tell you – teaching doesn’t pay the bills very well.
In 2016 I began building my freelance writing career as readers and other bloggers reached out to me for help with technical outdoor sports content strategy for online businesses. Within weeks I was overloaded with requests for freelance writing and my new career blossomed.
2018 saw the launch of Hike With Less, my ultralight backpacking partnership program with Dustin Walker.
How We Researched
To come up with the best ski tuning kits, we researched a variety of sources for reviews such as REI, Backcountry, Moosejaw, EVO along with our own personal experience.
We also consulted online magazines for product research and reviews to get as much unbiased information as we could. To help weed out fake reviews we used Fakespot.com to make sure we only looked at genuine reviews.
With so much quality gear available, we had to narrow it down based on what we felt were the best options were for the price. The author, Casey Fiedler was a full time ski instructor for Park City and The Canyons in Utah.
To help narrow down the selection, he used his personal experience along with recommendations from fellow ski instructors.
After extensive research, we came up with our list to help you choose the right one for you.
Sources