
Our Editors independently research, test, and rate what we feel are the best products. We use affiliate links and may receive a small commission on purchases.
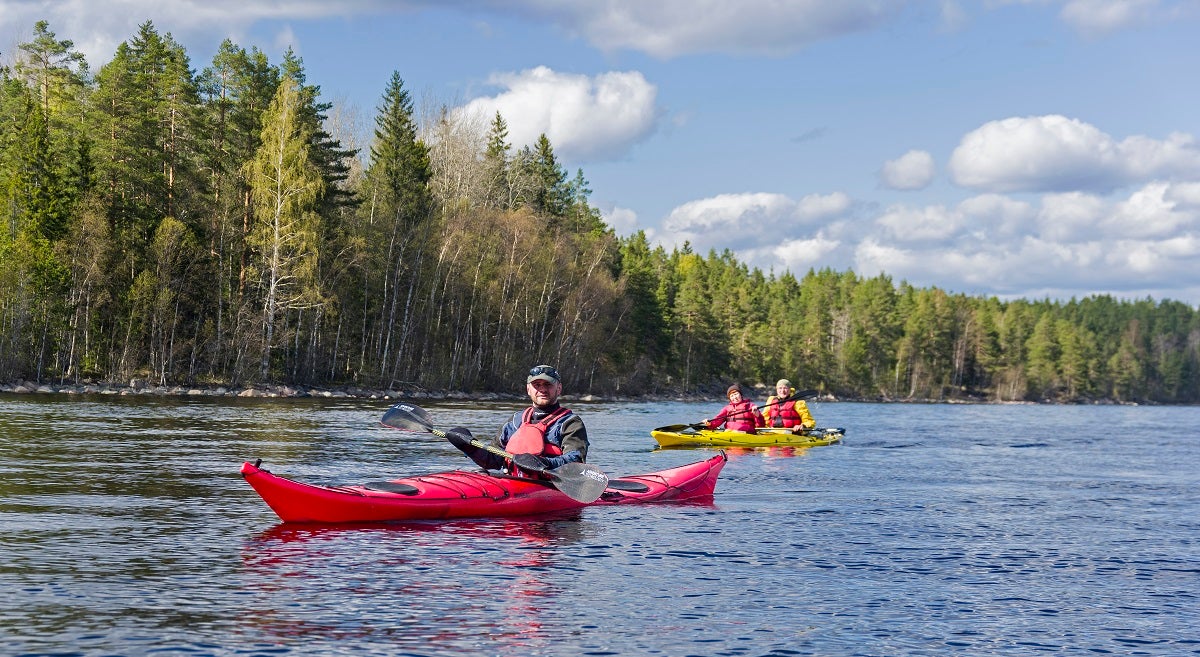
The kayak is the perfect solution for providing people with an inexpensive means of accessing their local bodies of water for the purpose of recreation, exploration and fishing. When learning how to kayak there are several aspects that should be considered; such as purchasing the correct type of kayak and paddle, paddling techniques plus getting the right type of clothing and safety gear for your needs.
Types of Kayaks:
First of all, you should be aware that all kayaks fall into one of two categories consisting of sit-on-top kayaks and sit-inside kayaks:
Sit-on-Top Kayaks
As the name implies, sit-on-top kayaks have open cockpits that leave the paddler completely exposed to the ravages of the Sun, wind, and waves. In addition, they have a higher center of gravity and typically have wider hulls than sit-inside kayaks.
Sit-On-Top kayaks are almost always shorter than sit-inside touring kayaks and when you combine their relatively wide beam with their relatively short length, you get a kayak that is of the slowest possible design and because the faster a kayak is, it takes less effort to paddle it
As a general rule, sit-on-top kayaks require the greatest amount of effort to paddle of all kayak designs.
On the plus side, they have legendary initial stability and are far easier to re-enter after a capsize and are by far the most popular type of beginner kayak and for fishing kayaks.
Sit-On-Top Kayaks designed especially for fishing include numerous special features such as specialized kayak seats, pull-up straps (to aid you in standing), standing platforms, instrument consoles, rod holders, in-hull rod compartments, and tank wells specially designed to hold a cooler or live well.
But, they often lack sealed storage compartments in the hull for carrying gear and instead many have only open wells with bungee cord retainers. Smaller kayaks that are designed for kids are almost exclusively sit on top kayaks.
Due to the open cockpit, there is no protection from the sun, wind, and water for the paddlers legs and feet and sit-on-top kayaks are significantly more difficult to maneuver because the paddler cannot use the pressure created by their knees pressing against the underside of the deck to help control the craft.
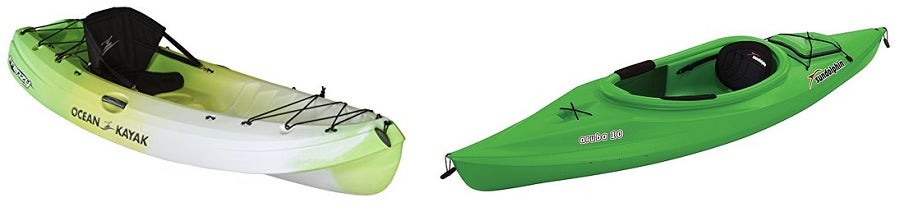
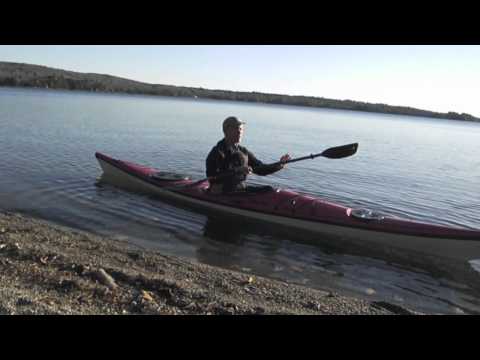
Sit-Inside Kayaks
As the name implies, sit-inside kayaks have partially enclosed cockpits that provide the paddler with protection from the ravages of the sun, wind, and waves and can be completely sealed using an accessory called a “spray skirt”.
They also have a significantly lower center of gravity than sit-on-top kayaks so instead of the paddler’s seat being positioned above the waterline, it is instead positioned below it. This cockpit design provides kayak designers with a much wider range of designs that they can create.
Because of this, sit-inside kayaks range from extremely short and wide to extremely long and slim. The myriad of different types of touring kayaks is easier to comprehend if you first understand that like sit-on-top kayaks, touring kayaks are also designed for specific purposes.
For instance, there are those that are specifically designed for paddling over short ranges on calm waters which are commonly called “recreational kayaks” or “rec boats” and which are characterized by a short length and a wide beam.
There are those that are specifically designed for playing in the surf, tidal rips, and rock gardens which are commonly called “play boats” and which are characterized by longer lengths than Recreational Kayaks as well as by low volume hulls with a high degree of “rocker” (the amount of end-to-end curvature in a kayak’s hull) to make them highly maneuverable.
Next, there is another class of touring kayak that is approximately the same size as a Play Boat but which has a hull design that is optimized for long distance travel rather than maneuverability.
Day Touring kayaks have higher volume hulls with significantly less rocker than Play Boats do so they are the best choice for paddlers who like to spend the day exploring their local bodies of water but who do not want to be limited to only traveling a short distance from their launch point.
The third class of Touring Kayak which is called an Expedition Kayak that is characterized by a relatively long length and a medium to high volume hull with a low degree of rocker which is specifically designed to carry medium to heavy loads over long distances. They are the best choice for paddlers who would like to use their kayaks for camping.
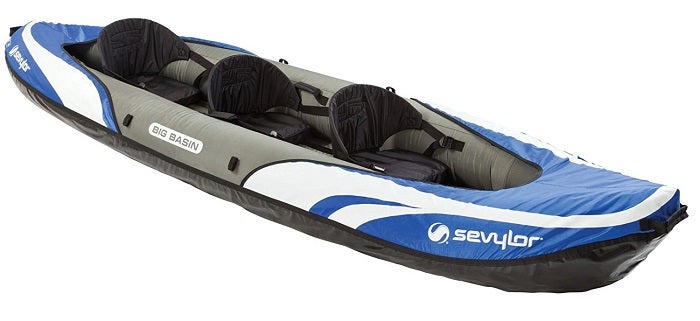
Inflatable Kayaks
This type of kayak is by necessity is a sit-inside kayak because it inflates and there would be no way for it to be a sit-inside kayak. They have some major advantages over other styles; notably ease of transport!
They are light, inflatable kayaks usually weigh 30 pounds or less and can easily fit in your trunk. It comes at a cost though, they do not track as well and are slower. So consider the trade offs before going that route.
Types of Kayak Paddles
In addition to the different types of kayaks, there are also different types of kayak paddles and each one is very different from the other in appearance, feel, and performance:
European Style Kayak Paddles
European style kayak paddles were originally invented by European whitewater paddlers who were looking for a new paddle design that would provide them with the “catch” (the amount of resistance a paddle has when pulled through the water) that they need to be able to negotiate whitewater rapids.
However, they also quickly gained popularity with both touring kayakers and sea kayakers and are now the single most popular type of kayak paddle.
They are characterized by long, slim, shafts connecting large, curved, blades and while some have straight shafts, others have “bent” shafts which display distinct angles in either side of the shaft where the paddlers hands grip the paddle that are designed to relive pressure on the paddler’s wrist.
European Style touring paddles are commonly available in one, two, and four piece designs. One-piece paddles are the strongest design but, they are also the most inconvenient to transport whereas, two-piece paddles have a joint in the center of the shaft that enables the paddler to break the paddle down into two pieces for easier transport.
Four-piece paddles are designed in such a way that not only does the shaft have a joint in the center, it also has one on either end so that the paddle blades can also be easily removed (and/or be exchanged for a different size or style).
In addition, European Style kayak paddles commonly have short, wide, blades with a large surface area and a curved face which is specifically designed to create a large amount of resistance when the paddle is drawn through the water.
However, it should also be noted that both blade size and shape can vary widely in order to create different types of paddles for different purposes.
Greenland Style Kayak Paddles
Greenland Style kayak paddles were originally developed by the indigenous peoples of Greenland and are characterized by relatively short shafts (called “looms”) with long, slim, blades that have straight edges and square tips. Also, like Aleutian Style paddles, Greenland Style paddles have blades that are narrowest at the “loom” and widest at the tip.
It should be noted that some Greenland Style paddles have a small shoulder where the loom meets the base of the paddle blade while others do not. Some paddlers have a distinct preference for “shouldered” Greenland paddles because the shoulder provides them with an easy means of knowing how the paddle blades are oriented (called “indexing” the paddle).
However, because Greenland style paddlers frequently move their hands up and down both the loom and blades of the paddle and even grasp the tip of the paddle in one hand or the other, some Greenland style paddlers prefer paddles without shoulders.
Last, there is an extra-short version of the Greenland Style paddle called a Storm Paddle that has normal length blades but which has a loom that is only two hands wide which is designed for use in high winds and rough seas.
Aleutian Style Kayak Paddles
Aleutian Style kayak paddles were originally developed by the indigenous peoples that inhabited Alaska’s Aleutian Islands and are characterized by relatively short shafts (called “looms”) with long, slim, blades that have leaf-shaped profiles and pointed tips.
Also, like Greenland Style paddles, Aleutian Style paddles have shouldered blades that are narrowest at the loom and widest at the tip and, even though their leaf-shaped blades present an entirely different profile from that of Greenland paddles, they do provide similar performance.
Paddle Materials
Paddles used to be only made from wood, however those days are long gone. There is a variety of materials from fiber glass, polyethylene and and the latest and greatist; carbon fiber. I am a big fan of carbon fiber kayak paddles, they are light and strong. The one downside is they can chip easier than other materials. So be careful pushing off with them.

How to Choose a Paddle Length
Most indigenous peoples used some sort of anatomical measurement to determine proper paddle length such as standing flat footed on level ground and then reaching one arm as high as you can and choosing a paddle length that is the same height as the cupped hand.
However, a far better method of determining proper paddle length is to first determine whether you prefer a low paddle stroke or a high paddle stroke and then choose your paddle length dependent on that preference combined with the width of the kayak you intend to be paddling.
For instance, a high paddle stroke is one in which the paddle’s shaft is held nearly vertical during the paddle stroke with the paddle’s blade deeply immersed which provides a tremendous amount of power
A low paddle stroke in one in which the paddle’s shaft is held nearly horizontal with the paddle’s blade shallowly immersed which provides less power but is far more comfortable over long distances.
Therefore a high paddle stroke favors shorter paddles and a fast cadence while a low paddle stroke favors longer paddles and a slower cadence.
Once you have determined what type of paddle stroke you prefer, you need to also choose the paddle’s length according to the width of the kayak you will be paddling.
For instance, wide kayaks require the use of a longer paddle whereas, narrow kayaks enable the use of shorter paddles.
Therefore, as a general rule, you should choose a European Style touring paddle between 215 cm and 240 cm (depending on your height and the width of the kayak) and choose both Greenland and Aleutian Style paddles in lengths between 210 cm and 225 cm (depending on your height and the width of the kayak).
Proper Clothing For Kayaking
In addition to choosing the correct type of kayak and the correct type of kayak paddle for your intended purpose, you will also need to choose proper paddle clothing. While cotton is acceptable for warm, sunny, days, there are other fabrics that are a far better choice when the weather is inclement.
Furthermore, there is the concept of dressing for immersion in which the paddler acknowledges the possibility of capsizing and dresses accordingly in either nylon clothing, a dry top and dry pants, a dry suite, a wet suite, or a Tuilik.
Nylon
Clothing made from lightweight nylon makes perfect paddle clothing because not only is nylon a very tough fabric, it also absorbs very little water and dries very fast.
Polyester Fleece
Artificial fleece is quite possibly one of Man’s greatest inventions and should surely rate right up there with the wheel! Like nylon, artificial fleece is lightweight and very comfortable to wear. It also has amazing insulating properties and, like nylon, it absorbs very little water and dries very fast.
Dry Tops
A dry top is a specialized, pull-over, paddle jacket that is made from a nylon outer shell with a waterproof lining and which has a second waterproof skirt sewn inside of the body which is designed to slip down inside of a spray skirt’s tunnel while the outer layer slips down over the outside of the tunnel to help keep out water.
In addition, they also have thin rubber seals at both the neck and wrists and sometimes have rubber seals as the waist as well.
Dry Pants
Dry pants are specialized pants made from a nylon outer shell with a waterproof lining and which have rubber seals at the waist and ankles to help keep out water.
Dry Suites
Dry Suites are like waterproof overalls with a nylon outer shell and a waterproof inner lining and zipper combined with rubber seals at the neck, wrists, and ankles to keep out water.
Wet Suites
Wet Suites are form fitting suites made from various thicknesses of neoprene rubber that allow a thin layer of water to enter the suite when immersed which then warms by absorbing body heat. These are typically only used when the weather is cold and rainy.
Tuilik
A Tuilik is a traditional Greenland paddling garment that combines a dry top and hood with a spray skirt. Thus, when worn, the Tuilik leaves only the paddlers face and hands exposed while the integral spray skirt fits tightly around the cockpit’s rim.
There are some small companies who are offering modern reproductions of this traditional paddle garment made from both nylon and neoprene.
Footwear
Although many paddlers choose to wear sandals, there is a wide range of specialized footwear made especially for paddlers which is commonly constructed using neoprene rubber uppers and sticky rubber soles.
Kayak Safety Gear
Spray skirt
A spray skirt is a round or oval cover made from nylon or neoprene with a bungee cord sewn to the perimeter of the deck section which is sized to fit tightly around the cockpit’s rim in order to create a watertight seal and which has a tunnel that extends up the paddlers torso. Thus, spray skirts are used to keep water out of the kayak’s cockpit.
PFD
A Personal Flotation Device is a device that a paddler wears while paddling which is designed to provide the paddler with flotation in the event of a capsize. PFD’s are available in several different types such as vests, jackets, and waist packs and, while some use a form of closed cell foam for fixed flotation, others use an inflatable air bladder that can be automatically inflated at will by the paddler using an integral air cylinder.
Although foam PFD’s are the most popular type, they are also the hottest and most uncomfortable type of PFD to wear. Whereas, inflatable PFD’s are the least popular type but, are also the coolest and most comfortable type to wear.
Bilge Pump
A bilge pump is a must have safety item for any sit-inside kayak in the event of a capsize it will enable you to remove the water from the kayak’s cockpit after you re-enter the kayak.
Paddle Leash
A paddle leash is simply a cord with a nylon collar on one end and a plastic or metal clip on the other and, to use one, the paddler simply wraps the nylon collar around the paddle’s shaft and secures it with the Velcro closure and then clips the other end to a deck bungee or perimeter line. That way, in the event of a capsize in heavy seas or swift currents, the paddle will always be attached to the kayak.
Paddle Float
A paddle float is a device that slips onto the end of the paddle in order to provide flotation when using the paddle as a brace for the kayak when performing a self-rescue after a capsize.
Tow Rope
A tow rope is a specially designed device that consists of a length of rope with a harness on one end that is designed to either fit around the paddler’s waist or the kayak’s cockpit and which has a clip on the other end so that it can be secured to something on the boat which is doing the towing.
However, the main reason that you should carry a tow rope is not so that you can tow others but, so that if you become injured and are unable to paddle, then you can easily be towed yourself.
Kayak Paddling Techniques
Once you have chosen a kayak and acquired all of the appropriate gear, you will then need to know how to paddle it. Fortunately, doing so is not difficult and the skills needed are well within the ability of most people.
Also, you should be aware that all of the various kayak paddle strokes are designed to either make the kayak move forward, move backward, move sideways, to pivot on its beam or, to enable you to prevent a capsize. With a bit of practice controlling a kayak is not a complicated process.
Please note: Because European Style kayak paddles are by far the most popular type, the following instructions are biased for use with Euro-blade paddles.
However, each of the following strokes can be performed with both Greenland and Aleutian paddles but, the technique required is a little different.
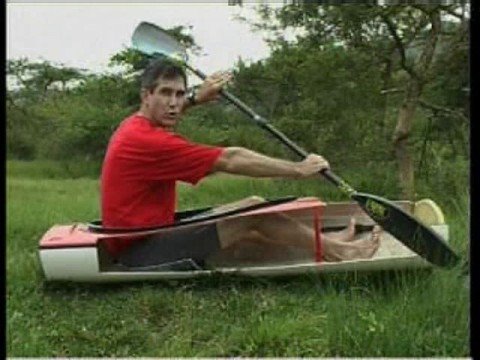
Entering a Kayak
To properly enter a kayak, first step into the cockpit and then sit down on the rear deck while placing your hands on either side of the cockpit rim. If you are using a tandem kayak, have your partner who will sit in the front get in first while you hold the kayak steady.
Extend your legs forward into the cockpit and then lift yourself up with your hands and slide your body forward until your bottom can be comfortably seated in the kayak’s seat.
Then draw your feet back and place them on the foot pegs located inside of the kayak’s cockpit while pressing your knees against the inside of the kayak’s deck.
Exiting a kayak
To exit a kayak, remove your feet from the foot pegs and straighten your legs. Then place your hands on either side of the cockpit rim and lift your body up and then side it back until you can sit on the rear deck.
Then, withdraw your legs and carefully lift your feet out of the cockpit before moving them to either side so that you can stand up.
Tip
Before entering or exiting a kayak on the water, try positioning it so that it is parallel to the shore and then, place the shaft of your paddle at the back of the cockpit such that it is perpendicular to the length of the kayak so that one of the paddle’s blade’s rests on the shore while the paddle’s shaft extends behind the cockpit.
Then, hold the paddle’s shaft in place by grasping both the cockpit rim and the paddle shaft at the same time while entering and exiting the kayak and while leaning to the side where the paddle’s blade makes contact with the shore so that the paddle will act as a brace to keep you upright.
Getting Situated
Once you are in the kayak, you will need to make certain that the foot braces are adjusted in such a way that when you place the balls of your feet on the foot braces, your knees are bent and are pressed firmly against the underside of the kayak’s deck.
Then, you will need to attach the spray skirt by inserting the attached bungee cord under the kayak’s rim starting at the back and working your way around to the sides.
Then, you will need to stretch the skirt into place and hook the bungee cord over the front of the kayak’s rim. Then, you will need to check the sides to make certain that they are properly sealed.
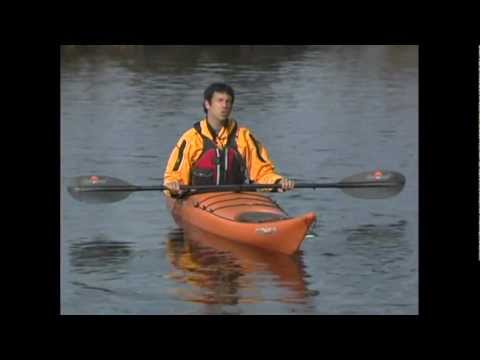
Proper Kayak Paddling Technique
The Forward Stroke
As the name implies, the Forward Stroke is designed to move the kayak in a forward direction. So to perform the Forward Stroke, grasp the paddle in both hands and hold it horizontal to the cockpit rim.
Then, rotate your entire upper body either to the right or the left while extending your arm on the same side and then dipping the paddle’s blade into the water in front of you.
Then, once the paddle blade is deeply immersed, proceed to draw the paddle backwards along the side of the kayak while rotating your entire upper body in the same direction and while also pushing with the same foot against the foot brace.
Once the stroke is complete, you lift the paddle blade from the water, rotate to the opposite side, and repeat
The Reverse Stroke
Also as the name implies, the Reverse Stroke is designed to move the kayak in a backward direction. So to perform the Reverse Stroke, grasp the paddle in both hands and hold it horizontal to the cockpit rim.
Then, rotate your entire upper body either to the right or the left while extending the arm on the same side and then dipping the paddle’s blade into the water behind you.
Then, once the paddle blade is deeply immersed, proceed to push the paddle backwards along the side of the kayak while rotating your entire upper body in the same direction and while also pushing with the same foot against the foot brace.
Once the stroke is complete, you then lift the paddle blade from the water, rotate to the opposite side and repeat
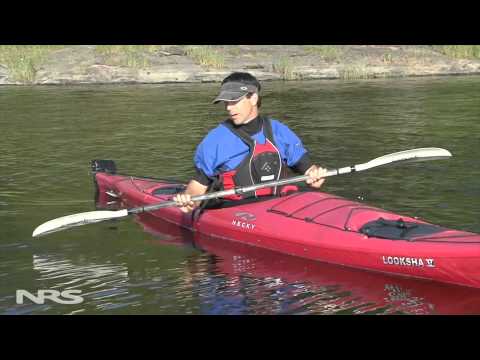
The Sweep Stroke
The Sweep Stroke is designed to spin or rotate the kayak by first leaning it on its side (the purpose of Secondary Stability) and then causing it spin on its center axis and it can be performed in either the forward or reverse directions.
To perform the Sweep Stroke, grasp the paddle in both hands and hold it horizontal to the cockpit rim and then lean the kayak onto the side on which you intend to turn.
Then, rotate your entire upper body either forward or backward while extending your arm on the same side and then dipping the paddle’s blade into the water as far from the side of the kayak as you can reach.
Once the paddle blade is shallowly immersed, proceed to either push or pull the paddle in a sweeping motion while causing it move just under the water’s surface while rotating your entire upper body and while also pushing with the same foot against the foot braces to cause the kayak to rotate on its center axis.
Once the stroke is complete, you then lift the paddle blade from the water and repeat the stroke on the same side until the kayak rotates to the position that you want it to.
Sculling
Sculling is designed to move the kayak sideways while remaining centered over the keel (not leaning) by raising the paddle to the vertical position such that one blade is inserted deeply into the water beside the paddler while the other blade is positioned directly above it.
Then, the paddle’s blade rotated slightly such that the edge of the blade closest to the bow is farthest away from the side of the kayak’s hull so that it acts like a plane’s wing. Then, the paddle’s blade is pushed forward while maintaining this angle.
Once the paddle has been pushed forward a few inches, the paddle’s blade is rotated to the opposite side and the direction of the paddle stroke is reversed. Then, this slight rotation combined with the forward and backward paddle stroke is repeated numerous times to draw the kayak sideways.
Bracing
Bracing is designed to help you stay upright and it consists of the Low Brace and the High Brace. Although both braces are designed to prevent a capsize, the Low Brace is performed on either side of the kayak with the back of the paddle blade and uses a low, nearly horizontal, paddle position.
Whereas the High Brace is performed using the face of the paddle blade and employs a high, nearly vertical, paddle position.
To begin with, the Low Brace is the brace used most often and it entails holding the kayak paddle such that the back of the blade is parallel to the surface of the water and then simply using the back of the paddle blade to push straight down on the surface of the water while leaning your upper body to the same side and “flicking” your hips to bring the kayak back underneath you.
The High Brace is performed similar to the Low Brace but, it entails holding the kayak paddle such that the face of the blade is parallel to the surface of the water and then using the front of the paddle blade to push down on the surface of the water while leaning your upper body to the same side and “flicking” your hips to bring the kayak back underneath you.
However, it should be noted that the High Brace is commonly only used in the event of an imminent capsize and when kayak surfing because of the close proximity of the paddler’s body to the surface of the water and the accompanying effort required to right the kayak.
Wrapping It Up
The process of paddling a kayak is not a difficult one provided that you have an understanding of the basics of proper paddling technique.
However, it is very important that you take the time to choose the correct kayak and kayak paddle for your particular purposes. This article will help you chose the best kayak for your needs if you don’t already have one.
Also, it is imperative that you acquire both proper paddling clothing and at least the bare minimum in kayak safety gear so that you will be prepared for your new sport.
Last, once you have all of your gear together and at least some idea of what you are doing, you might want to consider attending both a basic kayaking course as well as a self-rescue course with a competent kayak instructor because both classes will greatly boost your confidence level and allow you to relax and enjoy the ride.
If you need a guide on what to look for before you buy a kayak, see The Ultimate Guide On How To Buy A Kayak. I personally use an inflatable kayak, you can’t beat them for convenience and portability, here is a buyers guide. I also reviewed the best kayak paddles here.