
Our Editors independently research, test, and rate what we feel are the best products. We use affiliate links and may receive a small commission on purchases.
Rock climbing as a sport is definitely experiencing a rise in popularity. It offers fun, exercise, a healthy dose of adventure and allows you to experience nature in new ways.
Climbers are generally sociable and you will also get to meet new people. We’ve compiled the following how to guide to get you started on rock climbing as a beginner.
We’ll introduce you to different types of climbing, the gear, technique, and lingo. After reading, you can figure out which type of climbing you want to try and what you need to begin.
Disclaimer: This guide is no substitute for a beginner’s course and instructions by a professional at a climbing gym.
Safety is your foremost concern, so you need a reliable teacher to show you knots, technique and handling of equipment. We’ll go over the basics, but you’ll need practice in a safe, controlled environment.
Table Of Contents
Part I: The Different Types of Climbing
For the most part, climbing is a sport that requires a partner. You can do bouldering or top rope climbing at a gym with an automated belay machine on your own, but to fully experience rope climbing, you need to team up.
If you don’t have buddies who can introduce you to the sport, the best way to get started is an initiation course at a climbing gym. You’ll learn the essentials under supervision and get to meet people who are starting out just like you.
Don’t be intimidated: to newbies, it might seem climbing is about muscles, strength and showing off, but truth is, the greatest climbers are often the most humble or even shy people.
Also, technique matters more than style or strength, and your stature and reach make you unique – every route or problem presents itself differently to each climber, so it’s not about competition and all about finding your personal way up!
Bouldering
This is the most accessible form of climbing as it requires minimal gear and can be done solo, at least indoors. Bouldering is possible at climbing or bouldering gyms, as well as outdoors on real rocks, so-called boulders.
All you need are shoes and a bit of chalk. Bouldering does not use a rope or a harness to protect the climber. Instead, routes – or “problems” as they are called – usually don’t exceed 20 feet in height.
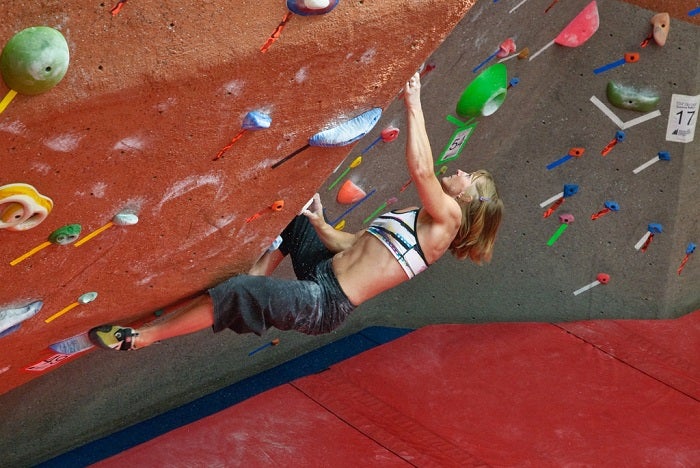 Photo: Jon Lytfyre on Flickr
Anything beyond that is often called highball bouldering. It poses a much greater risk for injury and is for experienced climbers only. In a boulder gym, you will find mats on the floor to protect from falls. Outside, climbers use crash pads to absorb the shock of a fall.
A partner can assist you in bouldering by constantly making sure the crash pad is aligned with your fall zone, keeping people from walking into your fall zone and by pointing out holds and moves.
This is called spotting. Bouldering is both a physical and mental activity as you try to solve the puzzle that each problem poses. It has a low entry barrier as most gyms also put up problems for beginners where you can train and have your first success in climbing.
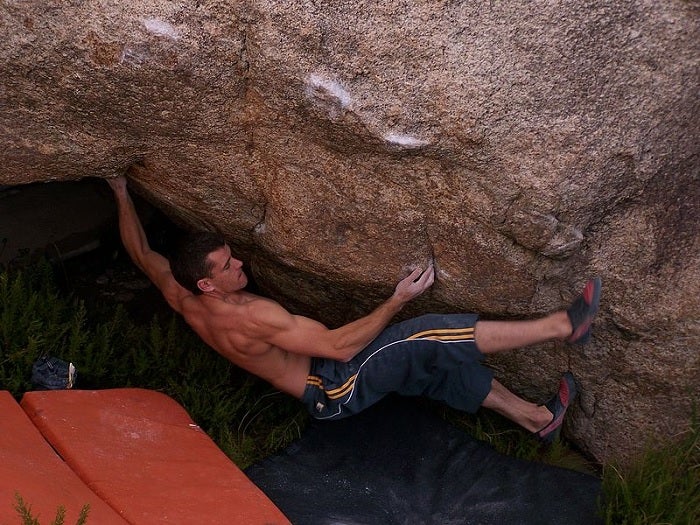 Photo: luis vilanova on Flickr
It’s a great way to learn climbing technique, because you can focus on movements and holds without being distracted by the rope.
Boulder problems are defined by holds for your hand and feet and need not be vertical: a sideways route is called a traverse.
Top Rope Climbing
Top-roping means the rope is already set up in an anchor at the top of the route. The climber ascends towards that point while the partner is pulling in the slack of the rope, thus keeping the climber safe.
With the anchor point above you and a taut rope, you’ll fall a minimal distance, if at all. You can easily rest by sitting in your harness when your partner, the belayer, has taken in all the slack.
Top roping is possibly in climbing gyms, where routes have already been set up, and outdoors. On real rock, it requires a lead climber to do the first ascent and set up the top rope, although on some routes, it’s possible to hike to the top.
An anchor can be bolted with two rings and a chain for redundancy, or be set up slings and carabiners on a sturdy enough tree or rock feature.
Belaying a climber is a skill you will need to learn as you go along. Top rope climbing requires a rope and a harness for climber and belayer as well as a belay device through which the rope passes.
Some gyms have auto-belay devices so you can top-rope without a partner.
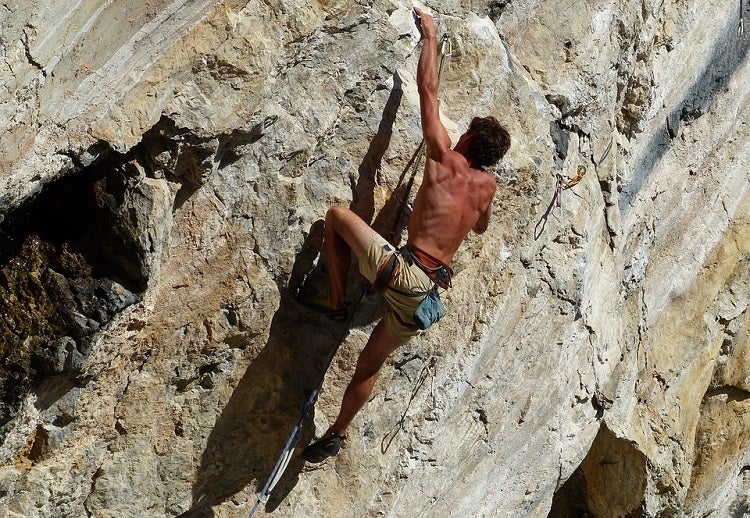
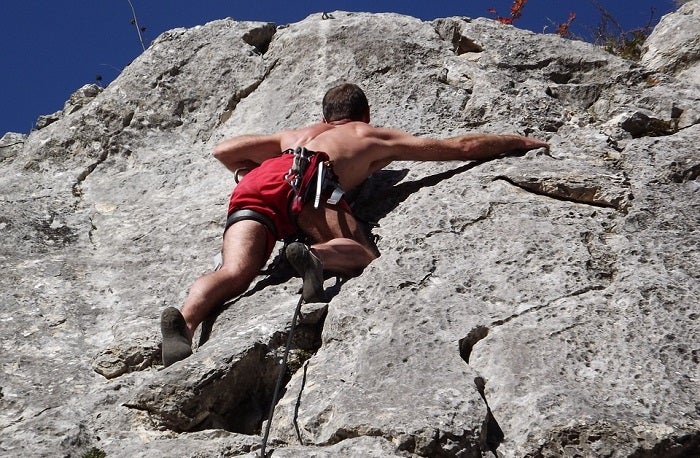
Sport Climbing
Sport climbing means a lead climber is ascending a wall while bringing the rope with them from the ground up. Bolts placed along the route allow the climber to clip the rope using quick-draws (a short sling with a carabiner at each end) to protect any falls.
At the top the climber builds an anchor or uses a permanent anchor already in place and is lowered by the belayer from the ground. Depending on the route and the set-up, it is then possible to do a second ascent as top-rope.
Sport climbing is the most common form of outdoor climbing, however it requires someone has already bolted the route. Because the climber needs to be lowered or lower himself, the rope length needs to be at least twice as long as the route.
Longer routes are called multi-pitches. Here, the lead climber ascend up to an anchor point, then belays the partner up to the anchor before continuing.
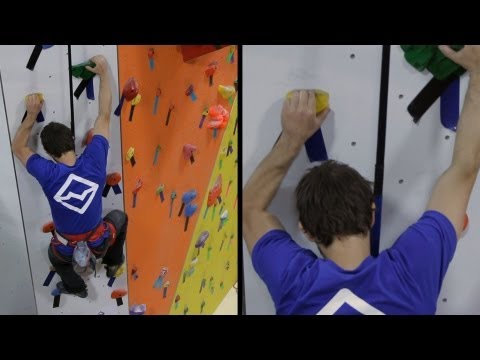
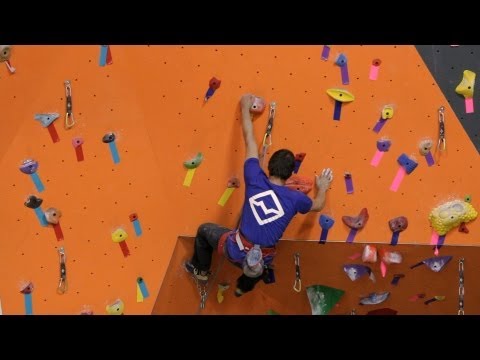
It is also possible to practice lead climbing in many climbing gyms – a great way to build up experience for climbing outdoors.
Trad, Alpine and Ice Climbing
Trad is short for traditional climbing. In this outdoor style, the lead climber places removable protection (such as nuts, cams and friends) along the route which will not remain after the climb is done.
This form of climbing allows for the exploration of any route or rock wall, but it requires experience, especially in how to properly place and remove the gear.
The advantage is that climbers are not limited to bolted routes and need not leave any trace on the wall. In some nature reserves, sport climbing can be impossible because bolts are prohibited, but trad climbing is allowed with some restriction.
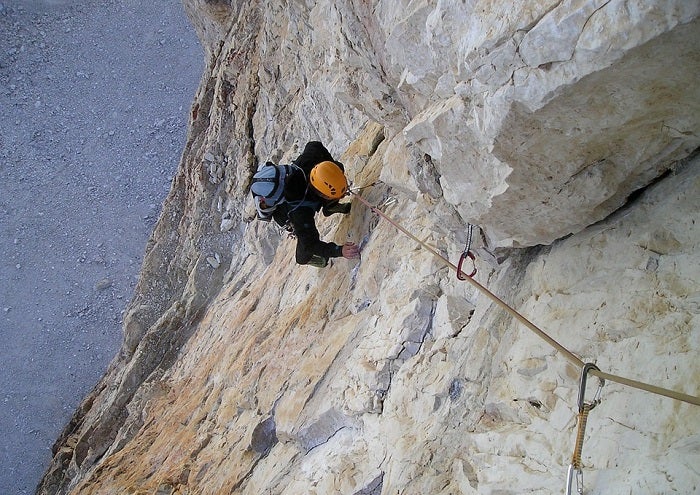
Alpine climbing has the primary aim of reaching the summit of a mountain. Routes here are very often multi-pitches, requiring several length of climbing rope.
It can be a mix of trad climbing, sport climbing, or aid climbing, where an aid such as a ladder, a cable or fixed rope, or pulling and stepping on gear is used.
Alpine climbs require careful route planning and selection, and knowledge of anchor and protection techniques, as well as the skill of how to bail, i.e. to abandon a climb in case of adverse weather or even an accident or emergency.
With more routes being bolted and constant equipment innovations, alpine climbing has become increasingly like sport climbing.
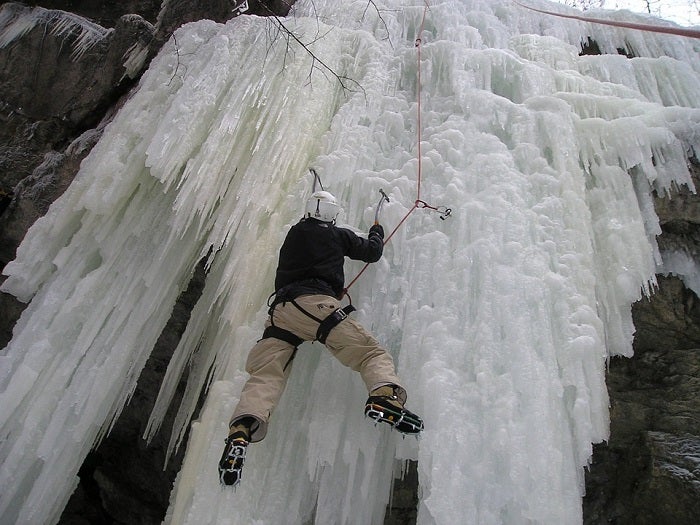
In ice climbing, climbers ascend ice formations such as frozen waterfalls and cliffs or slabs covered in ice. It can be part of an alpine attempt to summit a mountain, where an ice section is part of the route, or water ice, such as a frozen waterfall.
Ice climbing uses special equipment such as ice axes, picks and crampons to aid the climber and ice screws to place protection.
Free Climbing and Free Solo
The opposite of aid climbing is free climbing, meaning the climber makes upward progress solely by relying on the natural features of the rock wall as holds.
Gear is only used to protect a fall and for belay, not for pulling or standing on. However, the climber is protected by the rope, as opposed to during a free solo ascent.
During a free solo, the climber is completely on their own, with no rope, no harness and no protection. How is this different from bouldering?
A free solo climber reaches heights that would result in injury or death in the event of a fall. While some call it unethical or plain nuts, others call it the ultimate achievement. One of the most renowned free solo climbers is Alex Honnold.
Grading Routes
The US primarily uses the Yosemite Decimal Rating System to rate the difficulty of routes. The scale runs from 5.0 through 5.15, with difficulty increasing with a higher rating.
As a beginner, start with the easier routes in the range between 5.1 and 5.5. In a gym, an instructor can recommend routes for beginners.
As you progress, you’ll eventually try harder routes between 5.6 and 5.10. Beyond that grade, routes can have a letter from a to d attached to them to further distinguish difficulty, i.e. a 5.10d is harder than a 5.10b.
Boulder problems can use the same scale or be graded on the V-scale from V0 (easiest) to V16 (hardest). The grade of a route or problem takes into account holds, spacing, shape, necessary moves, steepness and terrain, but it is not an expression of “danger.”
When you complete a boulder problem or a lead climb with no falls, you “send” it. Doing a route or boulder first try without falling and no prior information is called “onsight.”
If you have received prior tips (called “beta”) or watched someone do it, you “flash” the route or problem. If you successfully do a free climb after several attempts, it’s called a “redpoint.”
The term “project” is used for a route or problem you’re working on but haven’t managed to complete. A “repetition” denotes a successful follow-up.
Part II: Rock Climbing Gear
In this section, we’ll introduce you to the most common gear used for rock climbing.
Climbing Shoes
Beginners often think climbing is largely pulling yourself up, but more experienced climbers know: it’s all in the legs and feet.
You’re pushing yourself up from footholds, and rock climbing shoes are the interface between your feet and the wall. They provide friction and allow you to stand on even small holds and ledges. Climbing shoes should fit snugly, are worn without socks and are not meant for walking.
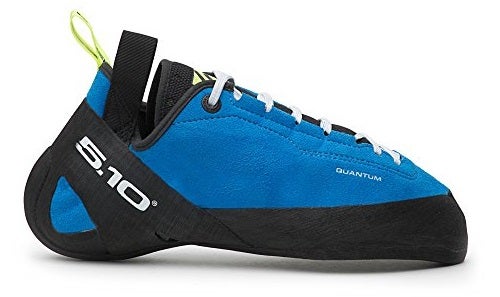 Due to their shape, they are a bit uncomfortable; however, they should not inflict pain. For your first pair, pick a pair for all-around performance that is comfortable enough.
Use our picks for the best climbing shoes for guidance. As you learn new skills, you can later upgrade to a pair of high performance climbing shoes.
Rope
The rope will catch a climber’s fall. The construction of a climbing rope is such that the rope absorbs a lot of the energy of the fall through elasticity.
A climbing rope consists of a core and a sheath. The core is there for strength, whereas the sheath is for protection and easier handling. Static ropes are no longer used for belaying a climber, but they can be used for rappelling, as a fixed aid or for hauling gear.
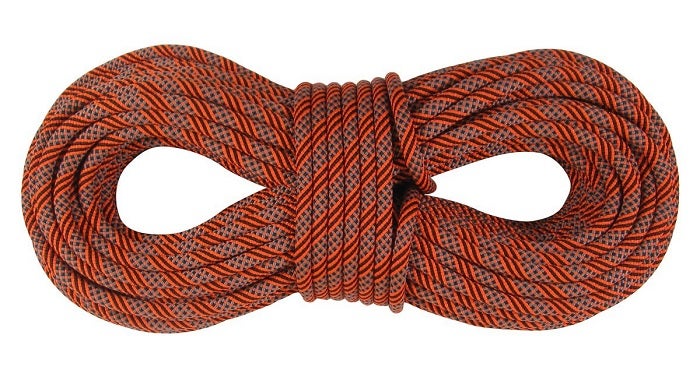 Climbing ropes are certified by the International Climbing and Mountaineering Federation (UIAA) with strict regulations of the number of falls, impact force and elasticity. Climbing ropes come in a variety of lengths and diameters.
Because the rope is doubled in belaying, you can only use half the length for climbing a route. A great multi-purpose rope has a diameter between 9.5 mm and 10.2 mm and a length of 65 or 76 yards.
If you’re starting out, a rope will not be your first purchase as gyms will provide them. Once you start lead climbing outside, you can consider buying your own. Use our picks for the best climbing ropes for guidance.
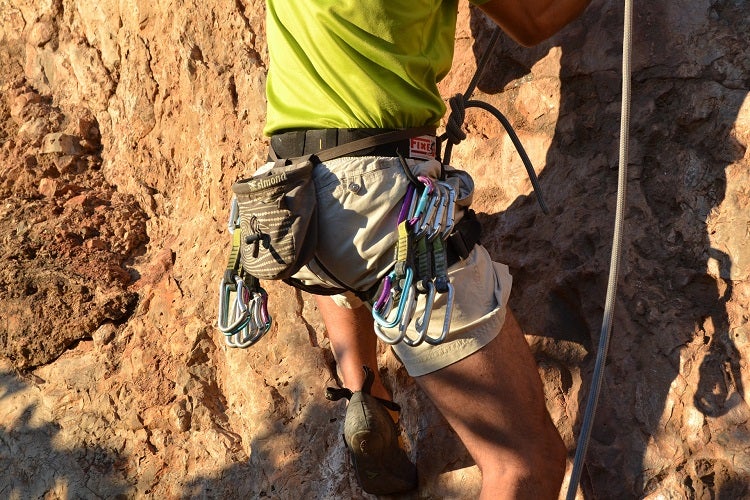
Harness
When you’re not bouldering, you need a harness. It is worn to connect the rope to the climber and the belayer. It consists of a padded and reinforced waist belt with leg loops connected by a belay loop.
Most harnesses have dedicated tie-in loops where you secure the rope with a special knot when you lead climb or top-rope. The belay loop is used when you secure a climber’s ascent.
Harnesses have a variety of different features and are often geared towards different types of climbing. Our guide to the best climbing harnesses will help you make the right selection.
Together with the rope, your harness is what keeps you safe. Therefore it is a piece of gear just as personal as your climbing shoes. You can usually rent one at a climbing gym, but beyond an instructional course, we highly getting your own for comfort.
Belay Device
This piece of equipment allows a belayer to control and handle the rope and secure a climber. A belay device works by introducing mechanical friction so the belayer can stop the rope with their “brake hand” and thus catch a fall.
A belay device is also used to lower a climber or to rappell. Belay devices can be passive or active, with semi-automatic locking to block the rope in the device.

Beginners often feel more safe when operating an active device, thinking the device can correct mistakes. The truth is, the more features and complexity a device has, the more prone it is to human error and mishandling.
The one rule you need to follow is: the brake hand never leaves the rope. Passive belay devices are the Black Diamond ATC (also available with guide) or the Epic Peak belay device.
Active belay devices which are straightforward to use are the Petzl GriGri2 and the Climbing Technology Click-Up Hms.
Climbing Pants
As a beginner, you can start climbing in any pair of pants that are comfortable and allow you enough freedom to move on the wall.
But as your skills improve, you’ll see the advantages of a dedicated pair of climbing pants. This functional piece of clothing protects your legs and knees and lets you stay warm or cool as you need.
We have selected the best climbing pants that combine comfort and performance and are suitable for various climbing types.
Carabiners
A carabiner is a strong yet light metal loop with a spring-loaded gate used to connect the rope to equipment such as a belay device, the harness or protection.
Climbers also use them to attach gear to their harness and to make quickdraws. Carabiners come in locking and non-locking, meaning they do or don’t feature a mechanism to block the gate from opening.
A carabiner lock can be a screw, twist or magnetic lock. As a beginner, your first carabiner will be one to use with your belay device.
The Belay Master 2 carabiner is a great choice because it features a mechanism to hold the carabiner in place while belaying and prevents the gate lock from unscrewing at the same time. It can be used with a wide range of belay devices.
For a HMS belay, the Black Diamond Rocklock carabiner is sufficient with its screwgate. The FresKaro Rock Climbing carabiner is a great multi-purpose twist lock carabiner.
Quick-Draws
Quick-draws connect the rope to a piece of protection or a bolt when climbing. Usually the lead climber will clip the quick-draws into existing bolts in a sport climbing ascent.
In the gym, lead climbing routes often have permanent draws installed. A quick-draw consists of two non-locking carabiners connected by a piece of sewn webbing.
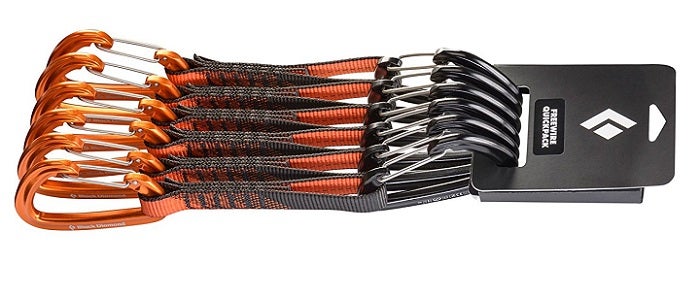 They are available in variable length, but sport climbing generally uses shorter (and therefore lighter) quick-draws. The carabiner that connects to the bolt is loose, while the one for the rope is rigid and kept in place by a tight noose in the webbing and a rubber strap.
This allows for easier rope clips. Quick-draws are usually sold in sets. During the ascent, climbers keep the quick-draws stowed on the gear loops of their harness.
Helmet
You don’t need a helmet at the gym, but outdoors, the purpose of a climbing helmet is to protect the head of a climber or belayer from falling rocks, debris or ice (and sometimes falling equipment).
A helmet can also protect in case of a bad fall where the climber collides with the rock wall. Climbing helmets are specifically designed for the sport and feature a hard shell and a system of straps for fitting it snugly.
Protection
When you’re just a beginner, you won’t be needing this type of equipment yet. Protection (often shortened to just “pro”) devices are placed by climbers in trad climbing where routes are not bolted.
On one side, a piece of protection has a feature that is placed in a crack or hole, while the other side has a sling, loop or hole to connect a quick-draw or carabiner.
Active protection has movable parts, such as spring-loaded cam. Passive protection uses a nut or a shaped piece of metal.
Chalk
Climbers use chalk (more accurately, magnesium carbonate) to reduce perspiration and moisture on their hands and thus improve their grip on holds.
In order to reduce microparticles in the air at the gym, it’s good practice to use a refillable chalk ball instead of loose chalk. Climbers usually keep their chalk in a chalk bag, which can be worn or attached to a harness.
Part III: Safety
Climbing is a relatively safe sport if you follow basic safety. Always know what you are doing and why you are doing it, and what the consequences are if you fail to do something or make a mistake.
As a general rule, most climbers overestimate the chances of equipment failure (due to damage or excessive force) and underestimate the chances of human error, such as inattention, improperly tied knots, mishandling of equipment, or misunderstandings.
Whatever decision you take in climbing, safety first should be your mantra, especially when another person relies on you.
It is therefore best to start learning in a controlled environment, such as a climbing gym, and with instructions from an experienced climber.
Before you start belaying another climber, you need to have learned proper technique under supervision from an instructor. After all, the climber’s life will literally be in your hands.
Always make sure you understand the specific equipment you are using – if you have learned to use one manufacturer’s belay device, it doesn’t follow you know how to use a different piece of gear.
Follow the instructions of a teacher at the gym, but also pay attention to the recommended gear usage as outlined in the manual of any equipment you buy.
Knots
As a climber, you will learn a variety of different knots. The first and most important one is the tie-in knot, which you use to secure the climbing rope to your harness.
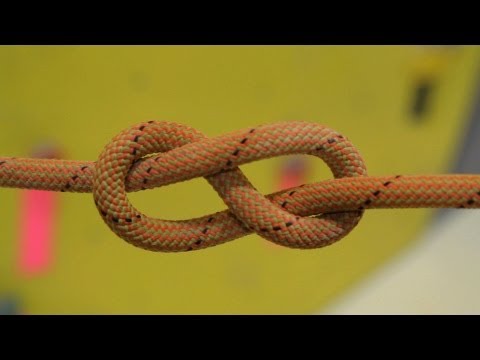
Beginners commonly learn the figure-eight knot, which is a stopper knot, meaning that it stops the rope from running out of your tie-in loops. It will pull itself tighter under force, i.e. in the event of a fall.
The double fisherman’s knot is a bend, a knot used to join two lengths of rope. Most commonly, climbers use it to secure the loose end of the rope after tying another knot, such as the figure-eight.
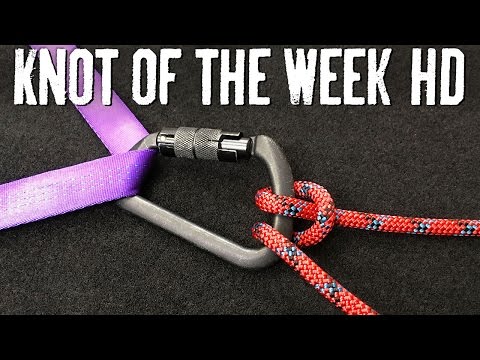
The Munter hitch, also known as Italian Hitch, is a simple knot. When paired with a wide carabiner, it can be used for belaying a climber without the need of a further belay device.
This method is known as HMS, short for the German Halbmastwurfsicherung, or half clove hitch belay. The downside is that it’s not as fast to feed out rope to a lead climber as with just a tube belay device, and that you constantly have to pull up instead of down, making it more strenuous to belay a climber (especially one who is taking frequent breaks).
Safety Check
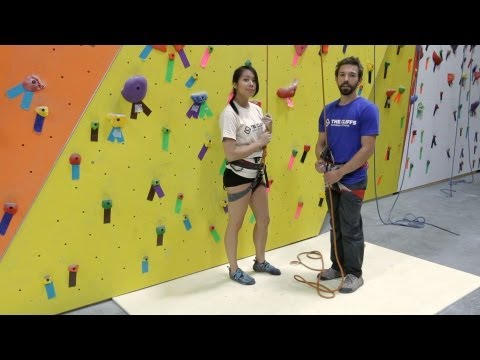
You should develop the habit of a safety check or partner check before climbing. Go over a couple of checks with your partner before each climb, where you check your partner and your partner checks you.
Always follow the same order, so go from top to bottom and make sure that helmets are properly clipped, harnesses are on correctly, the rope is tied in correctly at the tie-in point of the climber’s harness and that the rope is inserted the right way into the belay device of the belayer with the carabiner locked.
You should also inspect your gear at regular intervals for signs of abrasion or damage.
Communication
Because most types of rock climbing are a partner sport, safety also relies on clear communication between climber and belayer.
It’s good practice to call your partner’s name before addressing them with a command. It can get busy both at the gym and the crag, with fellow climbers issuing similar commands around you, so avoid confusion.
Acknowledge received communication verbally so your partner knows you are attentive. Before an ascent, the climber asks the belayer, “On belay?”
The belayer answers with “On belay!” or “Belay is on!” When starting to climb from the ground or after a rest on the wall, the climber says “Climbing!”
The belayer’s response is “Climb on!” If as a climber you want the belayer to take in slack to pull the rope taut, the command is, “Take!” If a climber slips or falls, they will yell “Falling!” to get the belayer to take action, which depends on the situation; usually it means pulling the rope taut.
A belayer’s attention should be 100% with the climber, so no other conversation or activity should take place.
Conclusion: Start Rock Climbing Step by Step
Rock climbing has a much lower threshold than you might think, and many people get into it even though they had or have a fear of heights.
Nearly every sport will attract certain daredevils, but the actual risks a common climber takes are controlled and very low. Visit your local gym and see what options for bouldering or sport climbing they have available, and what instructional courses you can take.
You can do your first trials with rented gear before eventually getting your own shoes, harness, and climbing pants. As you advance, you’ll grow your gear rack bit by bit.
A gym is also a good place to find people for an excursion to an outdoor climbing crag where an instructor or experienced climber can initiate you in outdoor sport climbing.
All forms of climbing provide you with both physical and mental exercise, but to many climbers, practicing the sport outdoors is the true form where you get to experience nature as well.
I hope this beginners guide was helpful to get you started in rock climbing. If you want to comment or have some advice I didn’t include, please use my contact form to get in touch.
Have fun and be safe!