
Our Editors independently research, test, and rate what we feel are the best products. We use affiliate links and may receive a small commission on purchases.
If you’re just getting started with skiing, then you may be wondering where to begin. You may have noticed that there are different kinds of skiing out there! Which is the right type for you? Well, we’re here to tell you all about each type so by the time you’re done reading there will be no doubt in your mind what kind of skiing you’re going to try out. We know you’re ready to get started so let’s hop right in!
Features of Nordic Skiing
We’ve talked about how Nordic skiing was developed over the years, but what does it look like in present-day? When you compare it to the downhill skiing we typically see at resorts, it’s quite a bit different. Nordic skiing features a free-heel binding system, whereas the others keep the entire foot attached to the ski. This allows you to lift your heel to offer a more natural stride, as if you were walking and climbing with shoes on.
Not only that, but you can expect Nordic skis and bindings to generally be notably lighter in weight and narrower. This helps even further in making for a natural movement and simplifies moving with them on
If you’re nervous about the high speeds that some skiers reach, then you may want to start out with cross country skiing. The great thing about skiing is that you don’t only have to stick to one type. You can move between them as your skills progress, as your sense of adventure becomes redefined, as you move between different mountains, etc.
Okay, so cross country skiing really has something for everyone. No matter if you’re a senior or if you’re looking to bring along your child, there’s a ton of versatility here. You’ll be able to stay on or off-trail with this type, which is great if you get easily bored and want to explore some untouched territory. Just make sure that you have the right equipment!
Now, there are 3 different types of cross country skiing: classic, skate skiing, and light touring. Let’s go through each one so you can start narrowing down your options.
1. Classic Cross Country
This is the most popular form and is also the easiest and quickest to learn. Why? Because you ski on tracks which help you slide along without putting too much force into it. Essentially, you’re gliding one foot forward, then the other, with the help of poles.
As arms move diagonal to legs, it creates a natural rhythm which feels intuitive to us as it’s very similar to walking. At a slower pace, it’s perfect for really taking in nature, fresh air, and beautiful views. At a faster pace, it’s an excellent cardio workout that will keep you in shape all winter long!
2. Skate Skiing
As you can probably guess by the name, this form is very similar to ice skating or even roller blading. It’s the same type of motion and concept, pushing the ski diagonally to move forward. Where it starts to differ from skating though, is where skating requires a lot of strength and force to gain high speeds, skate skiing is much easier. You’re really going to glide and be able to reach fast speeds with relatively little effort.
Skate skiing cannot be done anywhere except for on wide, groomed trails as this technique requires hard snow rather than the powder often found off-piste. The skis required for skating are a bit shorter than class cross country skis.
3. Light Touring
While the other two types of cross country skiing are great for beginners, light touring is for those who want something a bit more adventurous. This is the only type of cross country skiing perfect if you want to explore off-piste skiing but aren’t sure if you’re ready for it yet.
The skis required here are very similar to the classics with free heel bindings, but are typically a bit wider to provide added stability on ungroomed territory. If you ever feel like off-piste isn’t for you or the conditions just don’t allow for it, you can always go back to groomed trails too so it’s very versatile.
Telemark Skiing
What is the correct method?
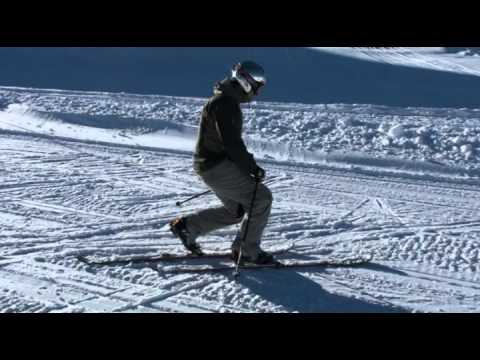
Telemarking is essentially a combination of Alpine and Nordic skiing elements. However, where it differs from alpine is that the inside ski is set backward with a smooth motion of the unbound heel. This is called the “Freeheel Position”. If you’re new to it, we recommend practicing this first in an area without snow.
The center of gravity should be right over the center of the skis, and by jumping you can move the forefoot to an almost full-lunge position. However, this is done in a very graceful movement that looks almost as if they’re dancing. Holding a pole above your head with both hands will give you added stability during this motion.
One huge advantage of Telemarking is the ability to attach skins (textured pieces of fabric) to the ski bottoms so you can travel uphill with them. This, along with the free heel allows you access to new backcountry spaces that you simply can’t access with cross country skis or really any skis with a fixed heel binding.
Main Advantages of Telemark Skiing
Let’s talk about the main advantages of Telemarking so you can determine if it fits into something you’d like to explore.
- Hiking and backcountry exploring is significantly easier and less of a hassle with telemark gear. As we previously mentioned, as the lifted heel creates a natural stride, you’ll be much more efficient and have to exert less energy in order to ascend a mountainside.
- If you learn to ski on this equipment, you’ll be able to ski much easier on just about any other skis. Newbies tend to lean forward and telemarking helps move them back onto the ski center, as well as helps to improve balance and agility.
- As the gear is so lightweight and easy to use (due to the free heel), it works well for beginners of any age. Children will feel more confident as it’s a more natural feeling to their bodies, and the lighter ski boots only aid in this. It’s all about the freedom!
- Many people love the appearance and elegance of the sport. If you aren’t drawn in by more aggressive ski styles, this may be the perfect alternative for you.
- Telemarking is actually known to be safer than alpine skiing and snowboarding. If you’re hesitant to try skiing because of risk of injury, this could be the technique you need.
- The level of physical conditioning required for proper telemarking is no joke. You’ll have no choice but to become fit, but also benefit from more well-balanced muscles and greater mobility.
Level of Fitness Needed
At this point you may be wondering just how fit you need to be to start out learning. We can’t say that it’s overall any more difficult than other ski styles; the challenging part is perfecting the technique. It’s kind of like a squat motion, repeatedly. As you can imagine, this can tire you out quickly, so high stamina is your best friend. If you really want to help yourself, we recommend training during the off-season as well.
Necessary Equipment
You’ll need the basics like telemark boots, special bindings, and the correct skis. With bindings, you’ll have either a 75mm with the notorious beak or the NewTelemarkNorm (NTN) which are comprised of the most cutting-edge materials and has been said to offer the most pleasant telemarking experience. It also doesn’t have that “beak” making it easy to visually differentiate between the two.
Similar to skiing you will need some warm clothing. Start with a good base layer, this is your primary way of staying warm. A good ski jacket will protect you from the elements. Don’t forget about pants, while not as critical they are still important.
A good, warm pair of ski gloves to keep your hands warm and allowing you to grip and control the ski poles are necessary as are goggles to protect your eyes from the UV rays and wind. Lastly, a balaclava or ski mask will protect your face from the cold weather and wind.
Backcountry Skiing
Ski Touring Equipment
Equipment has thankfully improved significantly since the times when Dartmouth first formed their ski touring club. Regarding skis, poles, boots, clothing, and safety equipment such as avalanche beacons. You can expect cutting-edge materials and designs.
You can expect each piece of gear to be generally very lightweight and easy to carry, as well as durable enough to offer you warmth and protection from the elements. However, due to the vast array of options out there, it’s also easy to become overwhelmed.
We’ll quickly run through each of the main pieces of equipment and what you should look for.
Ski Touring Boots
These boots are unique in that you need mobility and freedom to move naturally when climbing up the hill/mountain but stability and stiffness when skiing down it. At first glance, these boots will look and feel very similar to your average alpine ski boot. However, the main difference here is that the touring boots come with adjustable cuffs which facilitate a more inclined movement as you’re hiking uphill. This ensures you’re not limited or feel awkward/uncomfortable. If you put them on or simply pick them up, you’ll also notice that they’re lighter.
Bindings
There are a few options when it comes to Alpine touring (AT) bindings, from those dedicated just for touring, to specific backcountry hybrid bindings. While you’ll find little differences depending on the model and manufacturer, AT bindings will all come with a pivoting feature which allows you to lift your heels off the skis as you step. This makes for a more natural stepping motion, similar to how we move when we are hiking without skis.
Skins
The great news is, we no longer use the skin of animals while touring! Instead, we now have strips of incredibly tough nylon with synthetic fur on one side and a very sticky material on the other side to attach to the underside of your skis. These are what will give you enough traction to ascend hills with greater ease. Similar to skateboarding grip tape, you can choose skis that already come with it or you can make your own setup and buy and apply the skins separately.
What kind of other gear/clothing do you need?
As you know, you’re going to need the right outerwear and backpack to carry extras. If you’re frequently in frigid temperatures, you know that layering is the secret to staying warm and dry. Depending on the weather conditions, we recommend you keep a lightweight (waterproof) ski jacket with you at all times.
Underneath your ski jacket, a cotton t-shirt, along with a long-sleeved shirt over that should get the job done. Long johns or a base layer are ideal to wear underneath ski/snowboard pants. Always carry an extra pair of socks and hand warmers in your pack! Trust us, there will come a day when you need them.
In addition to socks, it’s necessary to bring with you some safety and backup supplies. Extra layers, as we mentioned, along with some dried fruit, nuts/trail mix, and water. Jerky is also a great way to conveniently get in some protein and fats without adding much bulk or weight to your pack.
As most ski touring takes place in the outback, there’s no excuse not to have avalanche safety equipment with you. This will consist of not only your basic first aid kit, but a shovel and probe at the very least.
When should you go ski touring?
This depends on the location you’re in, your skill level, as well as the snow conditions. Generally speaking, however, you can do it in the winter or early spring. Spring is actually often preferred by skiers, as you’ll find corn snow which has a kind of crusty, firmer surface. This makes for a really fun session, and is best found in early in the day or late afternoon.
In contrast, winter is when you’re more likely to find powder snow, which we all love. However, daylight will be shorter and conditions will be colder and windier. Not to mention, powder is only recommended for more experienced riders.
Mogul Skiing
What are moguls?
It doesn’t really help to know how to ski moguls if you don’t even know what they are! Simply put, they’re bumps and lumps located on certain groomed slopes. Sometimes they’re made on purpose by the resort but usually they come about by skiers carving down the mountainside.
Snow thrown out of the way by the skis will end up forming a large mound, which we call a “mogul”. Typically, each has a slightly flat top. The space between the moguls is called “the trough”.
How to Keep Your Balance
As with everything while skiing, keeping your balance is crucial. However, it will be a bit more challenging doing so on moguls. Here are a few tips to help you out:
- Keep your hands out in front of you: This is natural for many of us in everyday situations, but not so much on skis. This helps distribute bodyweight evenly and will help keep you facing downhill to give you enough speed to go onto the next mogul instead of getting stuck! Keep your eyes ahead and focus.
- Be flexible: The more flexible you are, the easier it’s going to be to move your body in order to keep your balance.
- Watch out for your poles: Make sure your poles arrive on the mogul before your skis! Plan your moves ahead of time.

Start Off Slow
This is probably logical no matter what you’re trying to accomplish on skis. Make sure you travel through the moguls in a way that you follow the fall line. This will typically mean you use a combo of turns, which is why it’s important to plan ahead.
How to Find an Easy Line
Pick Your Line: When you’re at the top of the run, make sure you’re envisioning a pathway down from how you can get down the most effectively without running into oddly spaced moguls. Or simply focus on an object in the distance, and make sure you stay on a straight line down. This will test your turning abilities but it will also make you into a better skier.
Get into a Rhythm: Try not to think so much – you’ll be surprised at what your subconscious can do. If you’re having trouble with that, you can try counting to a number of your choosing and turn every time you reach that number. Then start over and do it again. This will help keep your bodyweight balanced and to create that elegant, fluid motion that pro skiers are known for.
Aim High: You’ll want to head right up to the highest part of the bump and pole plant. This will further help you keep your rhythm and properly distribute weight. Once you’ve used this method to slow yourself down a bit, you’ll be able to ski right down the other side.
On Top or In Between?
We just went over the proper method to travel over moguls, but once you’ve mastered this technique, you may want to opt for the faster route. This involves turning on the outside of the trough, where you navigate around the moguls. To do this, follow the next tips:
- Stay outside: This is kind of obvious, but as you get nearer to the mogul, turn on the outside of the trough. Aim your turn on the uphill slope of the next mogul, using it as a little bank.
- Cross the trough: Once you do this, you’ll crest the next turn on the opposite side.
- Keep a level head: There are times you may feel like you’re getting tossed around in the bumps. Keep your body loose and your head level at all times. Instead of keeping your legs stiff and moving against the moguls, use them as a kind of suspension system, if you will. Still keep your body centered, but not so much that you’re pushing yourself to be lopsided.