
Our Editors independently research, test, and rate what we feel are the best products. We use affiliate links and may receive a small commission on purchases.
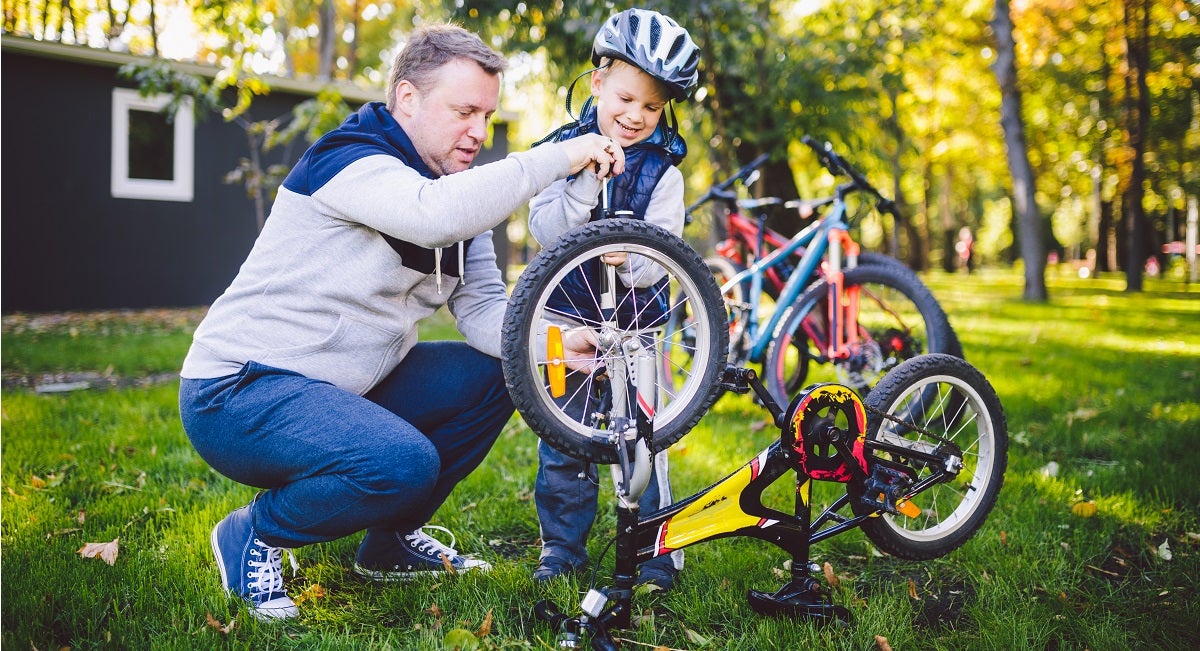
If your bike has been stored over winter, you’re probably itching to drag it out and take it for a spin. Before you hit the mountain bike trails, you need to conduct some simple checks and perform regular maintenance to ensure your safety and get the most out of your bike.
With a few small adjustments and changes, you can improve the quality and safety of your riding experience and the appearance of your bike.
The lockdown provides you with ample opportunity to research how your bike can be better customized to suit the specific kind of biking you most enjoy.
Before You Begin
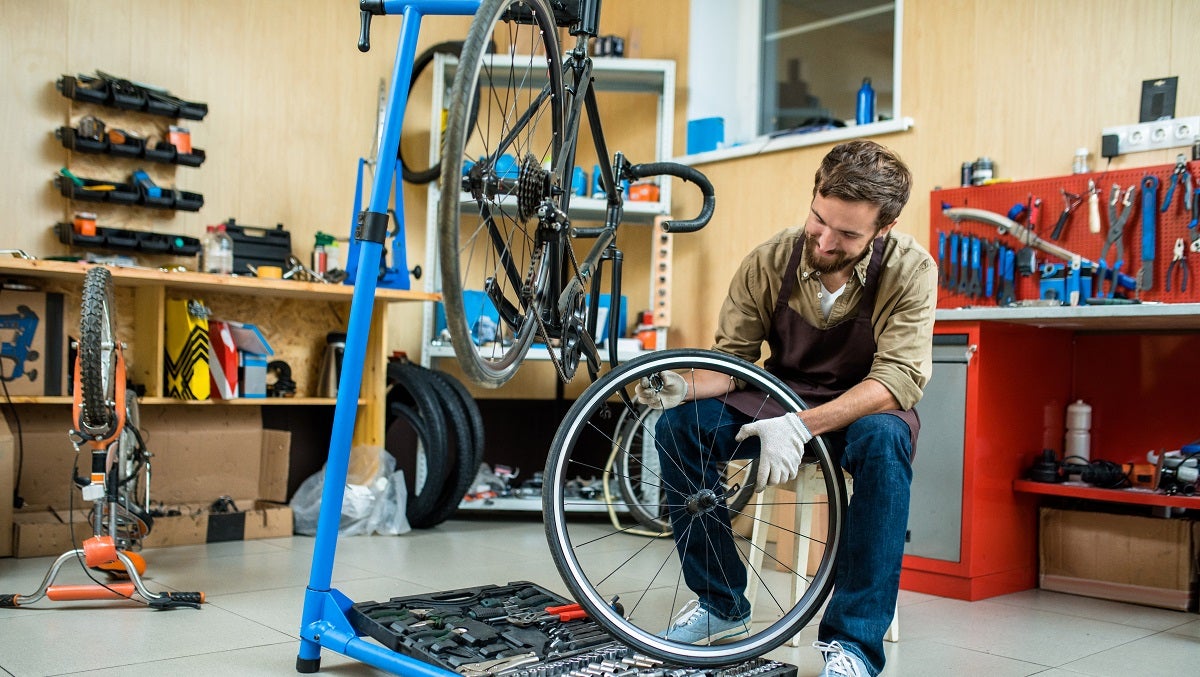
If you intend to perform your own bike maintenance, you should ensure you have a designated place to work on your bike and the right tools at hand. A spacious shed or clear area in your garage is ideal, though you may prefer to work outside in your yard when the weather is fine.
For many routine maintenance tasks, you’ll find it easier if you can place your bike on a bike repair stand. This will allow you to spin the wheels and make standard adjustments with both hands free to work.
For more than the most basic general repairs and maintenance, you require the contents of a bike tool kit. You’ll find a comprehensive tool kit cheaper and more convenient than buying the individual tools piecemeal as you discover you need them.
Sadly, you can’t carry the tool kit with you on your biking adventures. For on the go emergency repairs, you’ll need a durable bike multi-tool with multiple features. Another basic tool that every cyclist must own is a high-quality bike pump.
Storage
The better care you take of your bike, the less maintenance and fewer repairs it will require. Over winter or long periods of disuse, you should store your mountain bike somewhere where it is dry and protected from the elements. Cleaning your bike and lubricating the moving parts before storage will help prevent an unnecessary build-up of rust.
You may choose to store your bike in your garage or maybe inside a waterproof garden shed. You could even purchase a bike storage shed designed specially to protect bikes. Wherever you choose, it must be dry, clean, and secure.
Lubrication
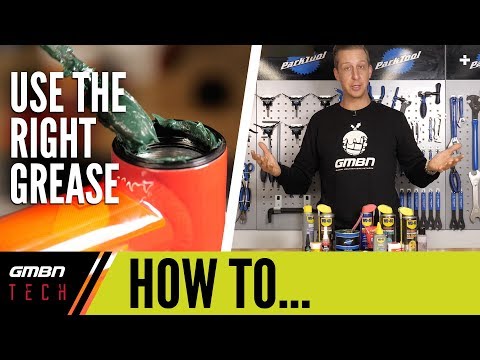
If you want your bike to perform well, you must ensure that the relevant moving parts are kept lubricated with a good quality oil to maximize freedom of motion while minimizing wear.
However, it is essential that you only lubricate the parts that require lubrication. Should your lubricant contaminate your brake discs, for example, the results can be disastrous.
As with all the basic repair and maintenance tasks below, you can research and watch YouTube videos like the one below posted by expert bike mechanics or read blogs written by keen bikers for instructions and tips. It’s always a good idea to learn from people more experienced than yourself.
Brakes
The ability to rapidly slow or stop your bike is essential to ensuring your safety on steep mountainous trails or when navigating through traffic.
The ability to moderate braking is also essential to handling turns in the most efficient way and for performing some neat tricks and techniques. For that reason, you should regularly check your brakes and perform any necessary maintenance.
Older mountain bikes have rim brakes. The lever on your handlebar puts tension on a cable causing rubber brake pads to rub against the metal rim of your bike’s wheel. Newer models use more effective hydraulic disc brakes.
These utilize brake fluid to push organic or sintered pads against a disc mounted to the wheel hub. They require less tension on the brake lever and provide more modulation. There are also disc brakes that utilize cables, but they are less effective than hydraulic models.
Rim Brakes
For effective braking with rim brakes, it’s important to ensure that the pads and rims are clean and that the pads are not too worn. If the grooves on the pad have worn off, the pad needs replacing. Clean the rims and pads with an alcohol-based cleaning product.
When you spin the wheel and apply the brakes, the twin pads should reach the rim simultaneously. The front of the pads should be toed in so that there is a millimeter of clearance at the rear when the front tip touches.
The tension on the cable should be such that your brake lever doesn’t bottom out against the handlebar. The spring tension on the brake arms is usually adjusted by turning a tension screw.
Hydraulic Disc Brakes
Just as with rim brakes, it’s important to keep the pads and disc clean and to replace worn pads. Organic pads wear quicker than sintered pads but provide better braking power.
New pads must be bedded in. Until they have been used around 20 times for heavy braking, they will not perform well. Experienced bikers will bed in their new brake pads on a level road before risking them on precarious slopes.
While bedding in the pads, the brakes will perform slightly better with each pull of the levers until they reach optimum efficiency.
Some brands of hydraulic disc brake feature adjustment screws on the lever. One adjustment screw controls the point of lever depression at which the pad hits the disc. Another screw allows the rider to change the position of the lever in relation to the handlebar to suit the rider’s hand size.
Over time, the brake fluid deteriorates and needs to be replaced to keep your brakes working effectively. If you squeeze your brake levers and they feel spongy, the fluid is ready to be changed. The process of changing the brake fluid is called bleeding.
Bleeding varies greatly between manufacturers. If you’re a confident bike mechanic, refer to your manufacturer’s instruction manual. If you’re uncertain, take your bike to a local bike repair shop.
Some manufacturers have designed to make this process easy while others might cause you to sweat and cry.
Bike Tires
Tires are also essential for your safety and the performance of your bike. When taking your bike out of storage, check for cracks in the tires in the sidewalls, tread worn in the center, cuts in the tire, and threads showing through from the inner structure of the tire.
If the tread in the center of your tire is less than 2 mm thick, your tire is worn out. Any visible threads or bad cracks also mean you should replace your tire.
Tires can last up to 5 years with minimum use before the rubber perishes or between 3000 and 8000 miles of frequent use. The reason this range in miles is so broad is that bike riders are all unique and so are the trails. If you ride more on the road, your tire will wear out quicker. If you only ride on mountain bike trails, your tires will last longer.
It is important to keep your bike’s tires in a good condition. If your tread is too worn, you will lose traction making it more difficult to climb steep slopes and dangerous to brake on slippery surfaces. Punctures can be a problem, especially with traditional style tires that utilize a separate innertube.
Modern tubeless tires are much more resistant to flats and ride faster than traditional tires. Many keen mountain bike enthusiasts are changing over to tubeless tires for these two reasons. However, tubeless tires are heavier than traditional tire and inner tube combinations and more difficult to repair in the event of a flat.
Tire Pressure
Your bike will have an optimum tire pressure. The tire manufacturer provides a recommended pressure range, which is often printed on the side of the tire in PSI (Pounds per Square Inch). Within this range, you’re given a lot of flexibility.
Lower pressure increases traction and grip. However, if your tire pressure falls below the recommended range, you will damage your tire’s sidewalls. Higher pressure allows the tire to roll quicker.
If you are above average weight or enjoy lots of jumps and heavy landings in your mountain biking adventures, you’ll need higher than average pressure in your tires. A high-pressure tire is generally better for cutting through muddy trails, but a low-pressure tire is better for traction over loose rocks and roots.
Your optimum pressure is a personal thing. You should experiment within the manufacturer’s recommended range until you find a pressure that feels best for the kind of trail you’re riding, your riding style, and your body weight.
Headlights
Another important safety consideration is working lights for night riding. When you’re preparing your bike for use, consider what time of day you’ll be riding and what the weather condition and visibility will be like. If you’re likely to require bike lights, make sure your bulbs are working and the batteries fully charged.
If you need to replace your bike lights, consider how you’re going to use your bike. The kind of bike lights you need for road riding are different to the specialized mountain bike headlights for riding along trails in the dark.
For road riding, the main function of your lights is to make you more visible to other road users and prevent accidents, especially in an urban environment. For this reason, flashing headlights are useful to make you more obvious to oncoming traffic.
For night trail riding, your headlights are required so you can see where you’re going. So, bike headlights for riding along trails feature a wider and brighter beam.
Comfort
While your safety and the performance of your bike are important, you also want to enjoy a comfortable ride. In order to achieve this, you’ll need a saddle suitable for your biking needs, suspension forks on the front, and rear shocks at the back.
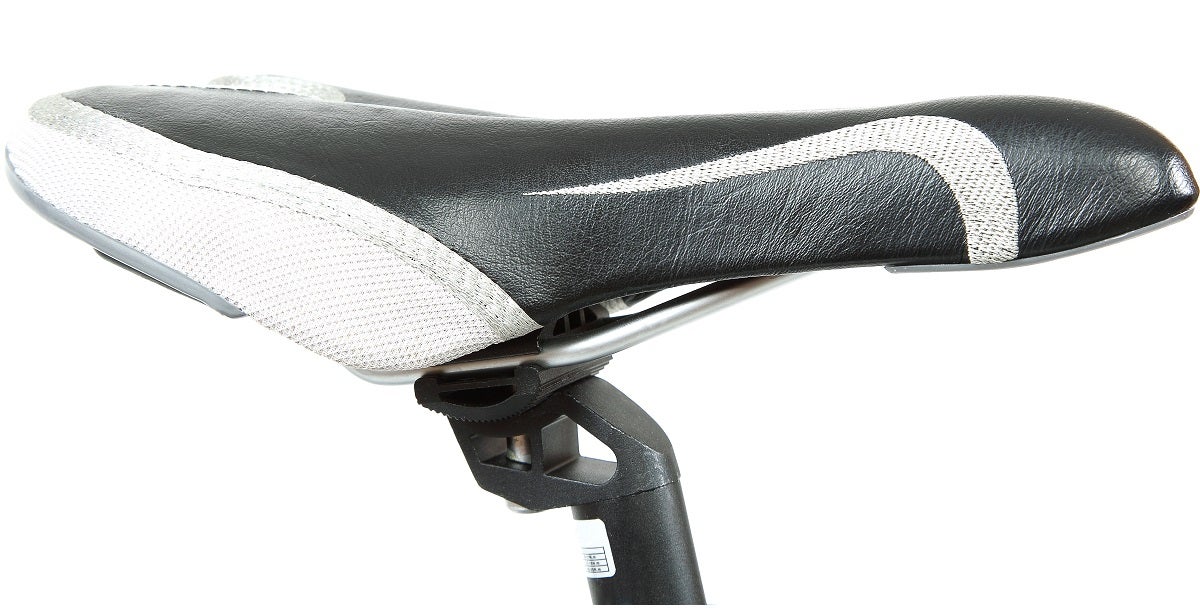
Saddle
When you purchase a new bike, it is fitted with a cheap stock saddle. This is because many riders have specific requirements in their saddle and will swap out the saddle for one more suitable to their needs.
Depending upon what kind of riding you do most, you need a mountain bike saddle or a road bike saddle that provides the best shape to match your seat. Saddle manufacturers do produce female and male models, but they don’t necessarily match the riders of those genders. It’s all to do with the width of your pelvis and your riding style.
Padding doesn’t really make a saddle more comfortable. It’s the shape of the saddle that’s important.
Wider saddles can be more comfortable for wider seats, but narrower saddles allow more ease of movement when changing from up-slope to down-slope, more efficient peddling, and are lighter for competition riders.
Thus, sometimes narrower and less padded seats prove more comfortable than wide, heavily padded seats for certain riders.
Suspension Fork
Older mountain bikes often use a rigid fork to hold and steer their front wheel. However, most newer models are fitted with a suspension fork. This not only provides you with a smoother ride over rough terrain, but it also ensures better traction during your ride as it pushes the tire into the ground ensuring continuous contact.
If your bike has a rigid fork, an unsuitable suspension fork, or a cheap suspension fork, you should consider swapping it for a suspension fork that matches your riding style. Suspension forks are either coil-sprung or air-sprung.
Coil-sprung forks are heavier than air-sprung forks and in the past were associated with poor quality suspension forks. Now there are some good quality coil-sprung forks on the market.
Generally, coil springs work better over small bumps providing a smooth ride and great traction while air-sprung forks offer progression which better protects you during hard landings after a long jump. For this reason and because of the weight differences, the different types of suspension fork are better for different styles of riding.
Another consideration is the amount of travel in a fork, which means the length difference between the fully depressed and fully extended fork. Travel is between 200mm and 80mm. Forks with more travel are suitable for larger bike frames. Forks with less travel are lighter.
Often, cross-country bikes use an air fork with a short amount of travel. Endurance riders frequently choose a coil-sprung fork with a relatively long travel.
Rear Shocks
Just like with suspension forks, different mountain bike rear shocks are suited to different styles of riding. If you’re riding an older bike, your shocks may be worn-out, and you should source better quality shocks to improve your riding experience, providing a smoother ride and better performance.
As with suspension forks, the shock mechanism will be either air-sprung or coil-sprung. The lighter air-sprung rear shocks are standard on trail bikes and cross-country bikes. The air pressure is adjustable enabling you to change how sensitive your rear shocks are to bumps.
Endurance and downhill riders usually choose coil-sprung rear shocks for a smoother ride over distances. Coil-sprung shocks are heavier and not adjustable.
Customizing
There are many ways you can adapt or improve your mountain bike, so it performs better on the terrain you choose. As well as replacing the rear shocks and saddle to give you a smoother ride, you can also change the handlebar, pedals, and seat post to improve the look and performance of your bike.
Handlebars
Modern mountain bike handlebars are ergonomically designed to provide optimum support when you’re dropping, railing corners, riding down a slope, and jumping. They come in different shapes suitable for different riders and different kinds of riding.
For example, taller riders prefer more rise in their handlebars so they can sit comfortably, and cross-country riders prefer flatter handlebars because they are forced into a low aerodynamic position.
Pedals
New bikes come with stock pedals which are often of inferior quality. You may wish to swap out your current pedals for ones better suited to your riding style. There are 2 types of mountain bike pedals: flat and clipless. Riders usually prefer one or the other.
Flat pedals, or platform pedals, provide a wide platform with pins designed to grip your shoe’s sole. These pedals are not attached to your shoes, so it’s easy to remove your feet from the pedal and plant them on the ground. This is often useful to prevent an accident or to distance yourself from your bike in a crash situation.
Despite their name, clipless pedals are designed to allow you to clip your shoe to the pedal. Your shoe is secured to the pedal until you twist your foot to gain release. This enables you to maintain foot contact with the pedal while riding over trough trails but does not allow you to remove your feet quickly from the pedal in an emergency.
Many cyclists believe that clipless pedals are more efficient than flat pedals because while one of your feet is pressing down, the clip allows your other foot to pull the opposite pedal up. However, recent research has proved that the difference in efficiency is negligible.
If you are not an experienced biker, you’ll feel safer riding with flat pedals. Also, various techniques such as the bunny hop cannot be learned properly with clipless pedals. At the moment, most mountain bike racers use clipless pedals. However, if you can only choose one type, you’d be better off purchasing flat pedals.
Dropper Posts
Mountain bikers who enjoy riding over rugged terrain understand the advantage of being able to drop their seat for steep descents and sweeping or tight turns.
However, even a quick-release clamp on the seat post takes time and focus to use when dropping your seat post. Dropper posts allow you to drop your seat post when needed at the touch of a lever on your handlebar.
Dropper posts are a relatively new development, but they’re quickly becoming very popular. Newer frames provide internal cable routing for dropper posts, which enable you to thread the cable for your new dropper post from the base of the seat tube. If your bike’s frame is old, you can find dropper posts with external routing.
An important part of fitting your dropping post is locating the handlebar lever in the right location. You should be able to trigger the post without taking your hand away from the handlebar. Dropping your seat post should be as effortless as shifting gears.
This is important because the more you discover the advantages of using a dropper post, the more frequently you’ll use it. Instead of only adjusting your seat for the steepest descents, you’ll find yourself dropping your seat a hundred times on more challenging 10-mile trails.
And finally…
Don’t let pride come before a fall. Literally! Make all the improvements, repairs, and alterations you want to your mountain bike as long as you feel comfortable doing so. However, if something is beyond your experience, don’t compromise.
Watch YouTube videos to see how experts handle the same repairs or maintenance issues. Read the blogs of expert mechanics and more experienced mountain bike enthusiasts and learn from their tips. But, if the job still seems too complex, don’t hesitate to get an expert bike mechanic to do it for you.
It’s better to admit defeat in the workshop than to find yourself on a remote mountainous trail with an injury caused by a badly fitted dropper post or failed brakes.